
This is now the second time that I’ve done this project and it’s a huge hit! I was approached by a preschool teacher who wanted to give her kids an end-of-year gift of a pillow case silkscreened with the class mantra. Her class has the nickname “Supernovas” and the 4 year-olds are finishing preschool and moving onto Kindergarten. Almost all of the children will be going to different elementary schools in the fall, so she wanted something that they could remember their friends as they transition to the new school. I love this idea!
But I don’t love the texture of silk-screened pillowcases. I was helping the kids silk-screen their own class t-shirts, which is fine for cotton tees, but I’m not sure I’d like to sleep on the silk-screen texture! Sublimation is perfect for pillowcases, especially since microfiber pillowcases are easy to find and comfortable to sleep on.
This post will walk you through how to make a pillowcase. It’s definitely a bring-your-own-image piece, however. This is not a “here’s how to get a perfect project” post. This post shows you is how I handled real-life situations on a fairly sizeable project. It all worked out, but there were some things that didn’t quite work perfectly, which I think is important for new (and experienced) crafters to see that everything doesn’t always go perfectly. There are some tips and techniques that don’t quite follow the standard advice but it sure made things easier for me.
Purchasing the Pillowcases
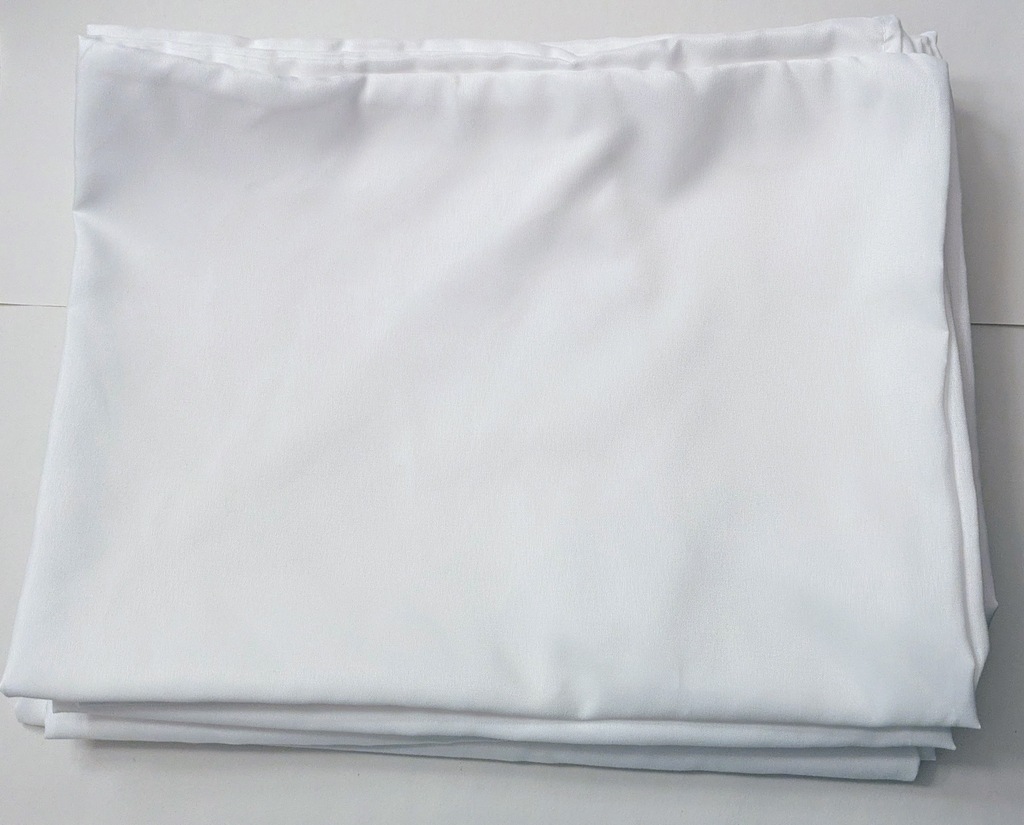
Do you need to buy pillow cases specifically designated as sublimation blanks? Nope. Any 100% polyester fabric will work, and this includes microfiber and most satin pillowcases.
Microfiber pillowcases are available in bulk for hotels, Airbnbs, and camps, so they’re easy to find in a 12 or 24 pack. Buying in bulk makes them very inexpensive for such a nice gift for the students! A 24 pack of standard-size microfiber pillowcases on Amazon runs anywhere from a high of around $1.25-$1.75 each (vs. $2.50-$5 each at Walmart or Target, purchased in 2 packs), but the teacher got lucky as the 24 pack was on sale for a total of $17.49. That $0.75 each! (Note on costs: Costs calculated in May, 2025, on stock purchased before tariffs hit.) These are not the thickest, most luxurious fabrics, but they are a reasonable quality for a kid’s bed. If I were making them for adults or to sell, I would definitely take a step up in quality.
Creating the Design
A standard size pillow case is 20″x26″ (51x56cm). A standard ET-2800 can print 8.5″ wide (29.6cm), and the only paper I had was letter size (21.5x28cm). One piece of paper, landscape, on that pillow case is going to look tiny. I was trying to figure out how to design it so I can piece two together easily (meaning there would be white space at the split). Turns out, we needed a place for all the kids to sign their names! A full-page design would be perfect to give them plenty of space!
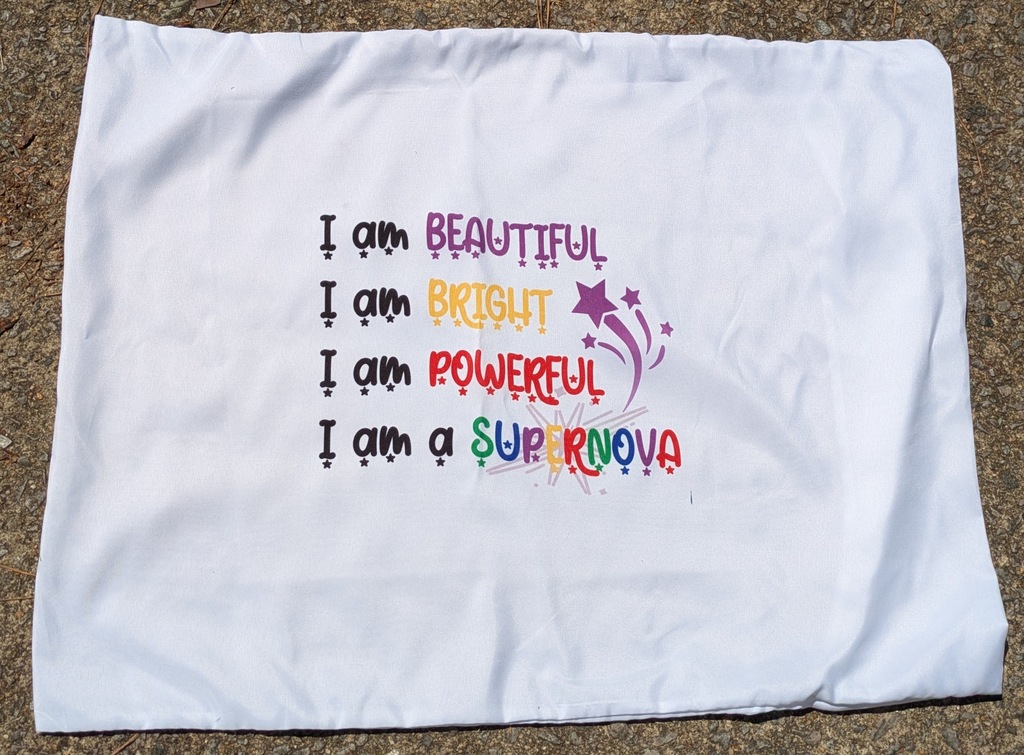
The class mantra, shown in the pics, is: “I am strong, I am brave, I am powerful, I am a supernova!” There’s a poster of it in their classroom and they say it every day. (It’s adorable when they say it!) There are three classes for four year-olds, all on the “stars” theme: supernovas, shining stars, and rock stars. I created a t-shirt design using Inkscape for each of the three classes for the silk-screen project, so I took the images from the tees and added the text of the mantra in a cute font that has stars on it.
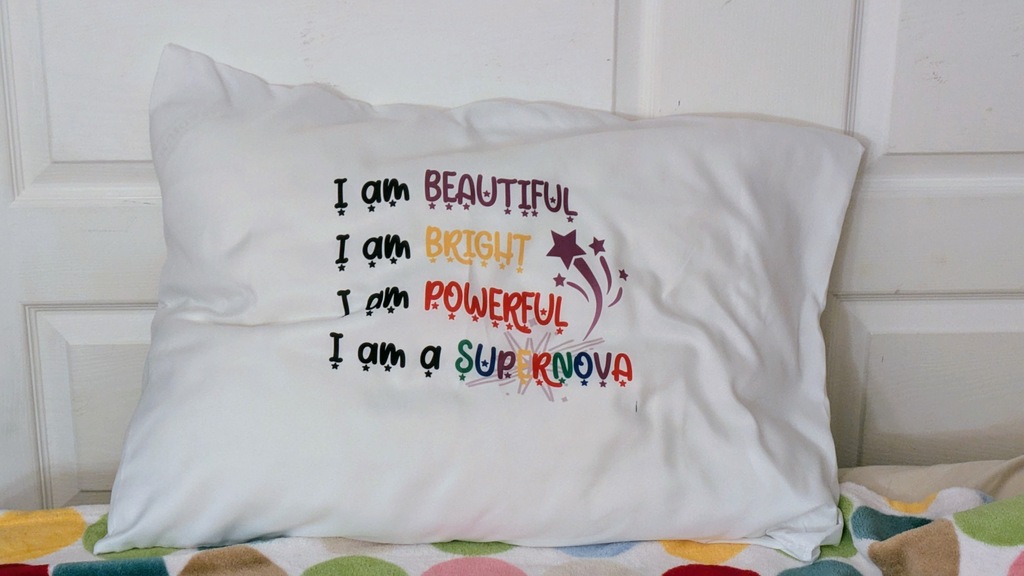
I set up the image with .12″/3mm margins because my ET-2800 cannot print borderless. You’ll soon see that the borders are a feature!
Printing
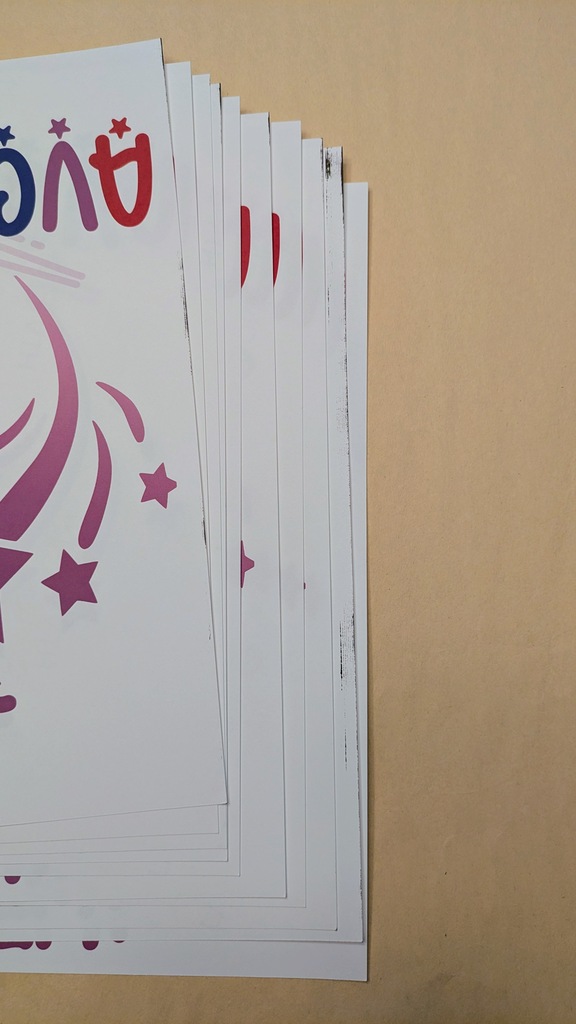
I typically send three full-page prints at a time to the EcoTanks. These are light-duty printers that need a break every 15-20 minutes or so. Printers working at maximum capacity for too long can start spitting ink droplets, then the printheads can start to overheat so the printing will slow down, then it can finally stop printing to keep from damaging the printhead. I’ll send three prints to the printer, then break for a few minutes and check them to be sure there are no clogs or problems printing. I printed them over two days since I wasn’t in a big hurry.
Then I needed to trim them, taking off a roughly 0.12″/3mm strip on each side of the paper. Despite using fresh paper stored completely flat, there’s a chance that the edges still pickup black ink that might be difficult to see. I always plan my design to be able to use a paper trimmer to trim off every edge that will contact the blank. I use a rotary paper trimmer and I can trim 3-4 prints at a time. All four edges need to be done.
It’s a good thing I did that, as about a third of them had very visible printhead strikes on the edges. See the pic below. Five of the 10 pages have black ink on them. One needed about .2″ cut off. This was fresh paper, stored flat. Half was A-Sub, the other half HTVront, both were 120g weight. This is why I really don’t mind that my printer doesn’t do borderless if the paper will end up contacting the printhead and I have to cut off part of my image!
Preparing the Pillowcases
Polyester fabric tends to have a lot of lint on it that tends to turn to bright blue specks and tiny squiggles when heated. The standard way to get rid of the lint is to use a lint roller. I did this the first year and still got a fair number of those tiny blue squiggles. Fortunately, this didn’t really matter as the kids’ signatures really distract from any imperfections. But it still bothers me and I wanted a good way to get rid of them. And it was taking A LOT of sticky layers of the lint roller.
I did a few, then pre-pressed them, just to mix things up a bit. Pre-pressing does two things: removes any moisture from the fabric (which takes 5-10 seconds) and to shrink the fabric (which takes 20-30 seconds). I was running into some of the wrinkles from being packed for so long causing further wrinkles that were pressed in, so I needed to try to press them out, which made things worse about half the time. I was not having fun. Surely there had to be a better way!
Trying an alternative prep method
I decided to put the pillowcases in the dryer to tumble around. I used the cotton setting (highest heat) to shrink them and the tumbling would likely dislodge a lot of the lint. I let it go for 30 minutes. And it looked like I had a lot of success judging by how full my lint catcher was. I could see the slight puckering around the stitching, indicating that the fabric had shrunk, or at least shrunk at a different rate than the thread. And the deep wrinkles were gone. I decided that I didn’t need to pre-press or lint roll. Was this a bad idea? We’ll see…
Figuring out how to place the design
I was looking for a quick and effective way to place the design. With a 15″x15″ press, it’s clear that the pillowcase would overhang the bottom platen, so how could I make sure I can find the center and make sure it’s straight? I thought about trying to measure 2.5″ on the top and bottom, and 5.5″ on either side so it would be perfectly centered on the platen, but getting that set up was taking several minutes per pillow in addition to the other setup and pressing. I was going to be there all night. And then I got an idea.
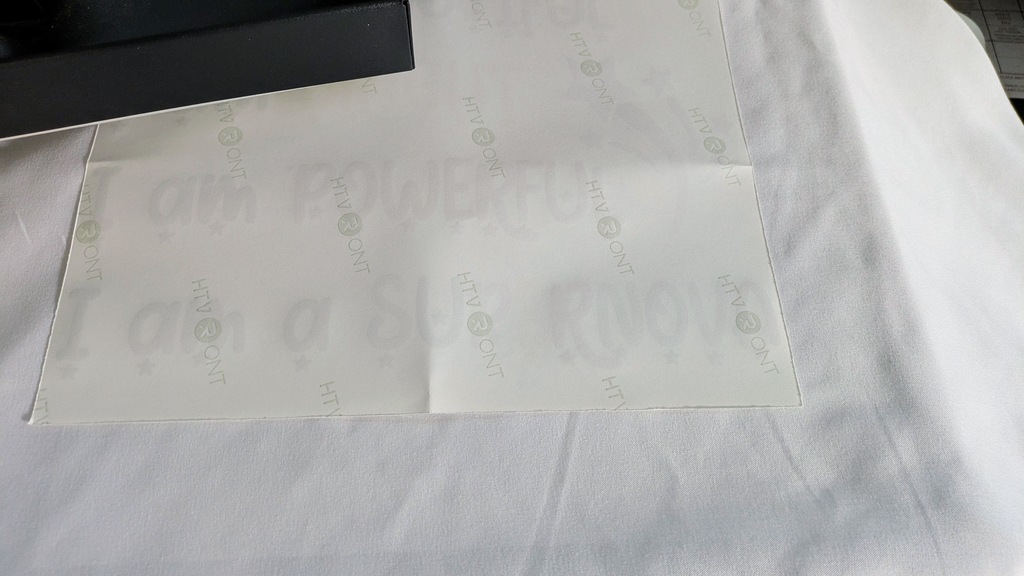
What if I carefully folded the pillowcase in half (bringing the short sides together) then in half again (bringing the top and bottom sides together) so it’s folded in quarters, like the picture? I need to be pretty accurate so that when I unfold it, the folds show me where the center is. Even better, I can find the center on the top and bottom of the print (fold the sides together and make a tiny fold at the bottom edge) and do the same for the right and left sides. If I line those up with the folds, it should be centered and straight! This makes is really easy to lay the pillowcase on the press and position the design quickly and easily. Does this work? It sounds like it would!
Where to put butcher paper
Pillowcases that cost less than $2 each aren’t exactly super-thick fabric. They’re quite thin. But are they thick enough to not blow through to the other side? It’d be best not to take a chance. My roll of butcher paper always comes off curled. For small projects, I just press it for a couple of seconds and it flattens out. I really don’t want to spend about a half-hour simply prepping the butcher paper for 24 pillowcases. Fortunately, I have some much thinner pre-cut butcher paper in 12″x12″ sheets. That would be perfect. One piece inside the pillowcase and one on the top of the print should work well.
A note about tape
I don’t use any with fabric. Instead, I position the pre-shrunk fabric, position the print, carefully lay the butcher paper on top, then press. After pressing, I slowly lift the press and swing it away, then immediately remove the butcher paper and print in one quick move. I’ve never had any ghosting this way.
Back when I did tape it, it gave me confidence that I could move the hot fabric with the print still attached. Nope. Unless you have something stiff underneath that is keeping the fabric from moving, you must remove the print from the fabric before you move it or you will get ghosting. Why tape if the print isn’t going to move?
Pressing the Pillowcases
So, it’s just put down the pillowcase, insert the butcher paper, line up the tiny folds on the print with the folds in the pillow case, put another sheet of butcher paper on, lower the press, and press at 385F/196C for 60 seconds. Did my methods of prepping really work?
Fantastically well, actually! There were only a few minor problems, all of which were so minor, the teacher didn’t even notice.
Did using the dryer to pre-shrink and de-lint work?
The alternative prep method of putting the pillowcases in the dryer to shrink and get the lint off worked tremendously well! They were all pre-shrunk and I had no ghosting at all from shrinking fabric. And I could only find one tiny blue speck of lint on 24 pillowcases. This was so much easier than pre-pressing and meticulously lint rolling and dealing with all those still somewhat sticky layers from the lint roller! Last year, when I did only 15 pillowcases, I spent over an hour on the prep and had lots of blue specks. This year it was minimal — throw the pillowcases in the dryer on high and wait 30 minutes.
Caveat: If you are selling your products, you may not want to do this. I do not know if you can do this and then sell the item as new, so you’ll have to check your state and local laws. But for friends and family as well as certain situations like doing a class gift, I think it’s totally OK to do. Note that I only used the dryer. I did not wash them specifically to avoid issues with detergent or softener allergies and sensitivities.
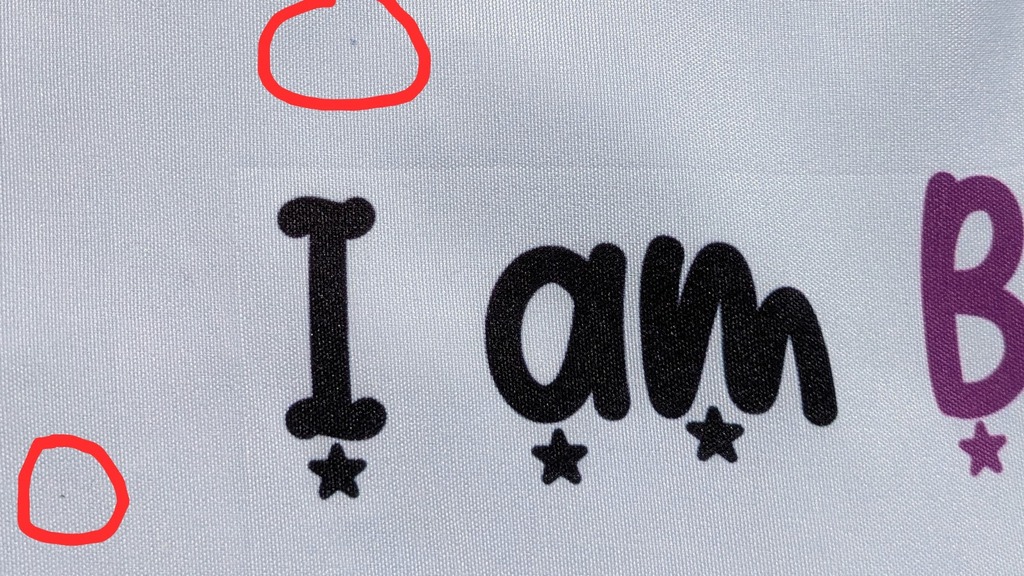
The pic shows the only tiny marks I found from lint. They are tinier than usual and really not that visible when the entire pillow is seen.
Did placing the design with folds work?
Yes, it did! They all were place nice and straight and centered. Because the kids will sign around the image, if it’s off by a little, it really won’t matter, but these were quite consistently centered and straight. I’ll definitely do this again!
One thing to note: I wanted the pillowcase opening on the right and they had an envelope-type flap that I wanted on the top side. Several times I laid the pillowcase down so it was upside-down. The residual heat on the mat can iron out those folds! I just refolded them and put them at the bottom of the pile to give the folds plenty of time to set and tried to make sure I always put them proper side up (I wasn’t perfect on this, but it’s an easy fix).
Was the butcher paper in the middle a good idea?
After three or four pillowcases, I was wondering if that was a good idea because it was really time-consuming and it seems so wasteful. I wasn’t seeing any blowout on the prints, so maybe it wasn’t truly necessary. The very next pillowcase, I wound up letting it go another 10 seconds (I got distracted!), and that was enough to show the design on the blowout paper! Phew! I’m glad I had the blowout paper.
Do watch where you put the blowout paper, though. If you’re using 12″x12″ cut sheets on an 8.5″x11″ paper, be very sure that the blowout paper is actually under the entire print! I didn’t pay close enough attention and the print was about 2″ off of the blowout paper, causing a light image of the design to transfer to the back of the pillowcase! This was the only pillowcase that was a waste, though the teacher thought it was fine, since you only see the top side of the pillow when the bed is made, and it was really faint on the back.

Was the lack of tape a problem?
Nope. No ghosting at all. Release the handle slowly and remove both the butcher paper and print in one very quick motion.
How about trimming the prints before pressing?
Clearly, that was a good thing to do as there were many with visible printhead strikes after printing! However, two prints still had a tiny bit of black in on one corner. One was pressed, the other was the next print and I was able to find it and cut it off before it made a mark. (Note to self: trimming two or three prints at a time means you don’t visually look at every side on every print!) For our purposes, the little mark is no big deal because there are going to be many extraneous marks from the kids signing each other’s pillowcases. I will still continue to trim every print where the edge of the paper might contact the blank, and even so, some ink can wind up transferring and it can be very difficult to see.
And no, there’s no way to remove those little marks of black ink. We love the fact that our designs don’t fade in the wash, but it also means that mistakes are permanent.
Would I Do This Project Again?
Yes! Well, this was the second time I did it, and I’ve committed to doing it again next year, too.
I think this is a particularly wonderful gift for a children’s or youth group. It’s quite inexpensive.
- The pillowcases run $0.75-$1.75 for inexpensive pillowcases in a 24 pack.
- Sublimation paper tends to run somewhere between $0.12 – $0.20 per sheet.
- Ink for a sublimation printer varies per ml. For converted Epsons, it’s about $0.08/ml, Epson Sublimation printers are $0.18/ml, Brother printers are $0.63/ml, and Sawgrass is $2.42/ml. The most ink that can be used on a letter-size print is about .5ml, but most designs tend to run about .3 ml. Using .5ml, that’s $0.04 per print for a converted Epson up to $1.41 for a Sawgrass.
- Butcher paper pre-cut sheets run about $0.5 per sheet, so that’s $.10.
- That’s a total of $1.01-$2.09 for Epson ink. (Compare with Sawgrass ink: $2.38-$3.46)
So for $1 to $2 (exclusive of my time, which averaged less than 15 minutes per pillowcase), the teachers have an amazing gift for their kids that feels like it’s worth much more than that. Particularly with those signatures. These would make a wonderful party favor for a kid’s birthday party, too.