 I’ve had a lot of interest on the first three parts of my series on Sharpies on Ceramics.The original project that makes the Pinterest rounds says that all one needs to do is to draw on a ceramic or glass piece with Sharpies, bake at 350F for 30 minutes, let cool, and voilà, you have a dishwasher-safe item destined to become an heirloom. Well, my experiment that I documented in Part I pretty much says that regular Sharpies won’t work, and Part II notes that while oil-based and metallic Sharpies will work for some lighter-duty applications, there are several products out there that will work much better than Sharpies. Part III builds on Part II by running the test piece through the dishwasher 10 times.
I’ve received comments (on the blog page, by email, and in person) that regular Sharpies really will work. I’m just not doing it right because I just didn’t trace over it twice. Or that I need to seal it. That’s fine, but that’s not what the original directions said. I tried the trace over it twice thing in Part II, and while it does work better, it still isn’t good enough to last through several handwashings, let alone go through the dishwasher.
This time, I’m testing sealing it. It’s supposed to solve everything.
Let me say that I’m skeptical. Glass and ceramics are non-porous (OK, some “low fire” glazes are somewhat porous…”low” meaning “above 1000 degrees Farenheit”). Most water and alcohol based media need some sort of “tooth” or porousity to grab onto to bind the pigment to the surface. Oil-based media work differently, and don’t need that “tooth” to hold on. To permanently adhere to glass or ceramics, though, either you’ll need a glaze, frit, or enamel that will fire at 1000-3000 degrees Farenheit or something specifically designed for glass. And there are water-based products out there that will cure in your home oven at 350F. Just not Sharpies. And if Sharpies won’t work, why would a sealant work?
The one that keeps getting mentioned is Mod Podge. Now, I love me some Mod Podge. I have many, many fond memories of Mod Podging from my youth. It’s a great product. But for glass or ceramics? Hmmm. And for dishwasher-safe items? Color me VERY skeptical. Again…the whole water-based media being unable to bond to non-porous material means that it’ll likely wash off (especially in the dishwasher), and is Mod Podge even waterproof? Even if it did work, what does Mod Podge (or any sealant) look like on glass or ceramics? That gorgeous, sleek, gloss of the glass or ceramic piece is bound to be dulled by even glossy Mod Podge, and it’s likely that brush strokes will be visible. I can’t imagine it would look that great. But I’ll try.
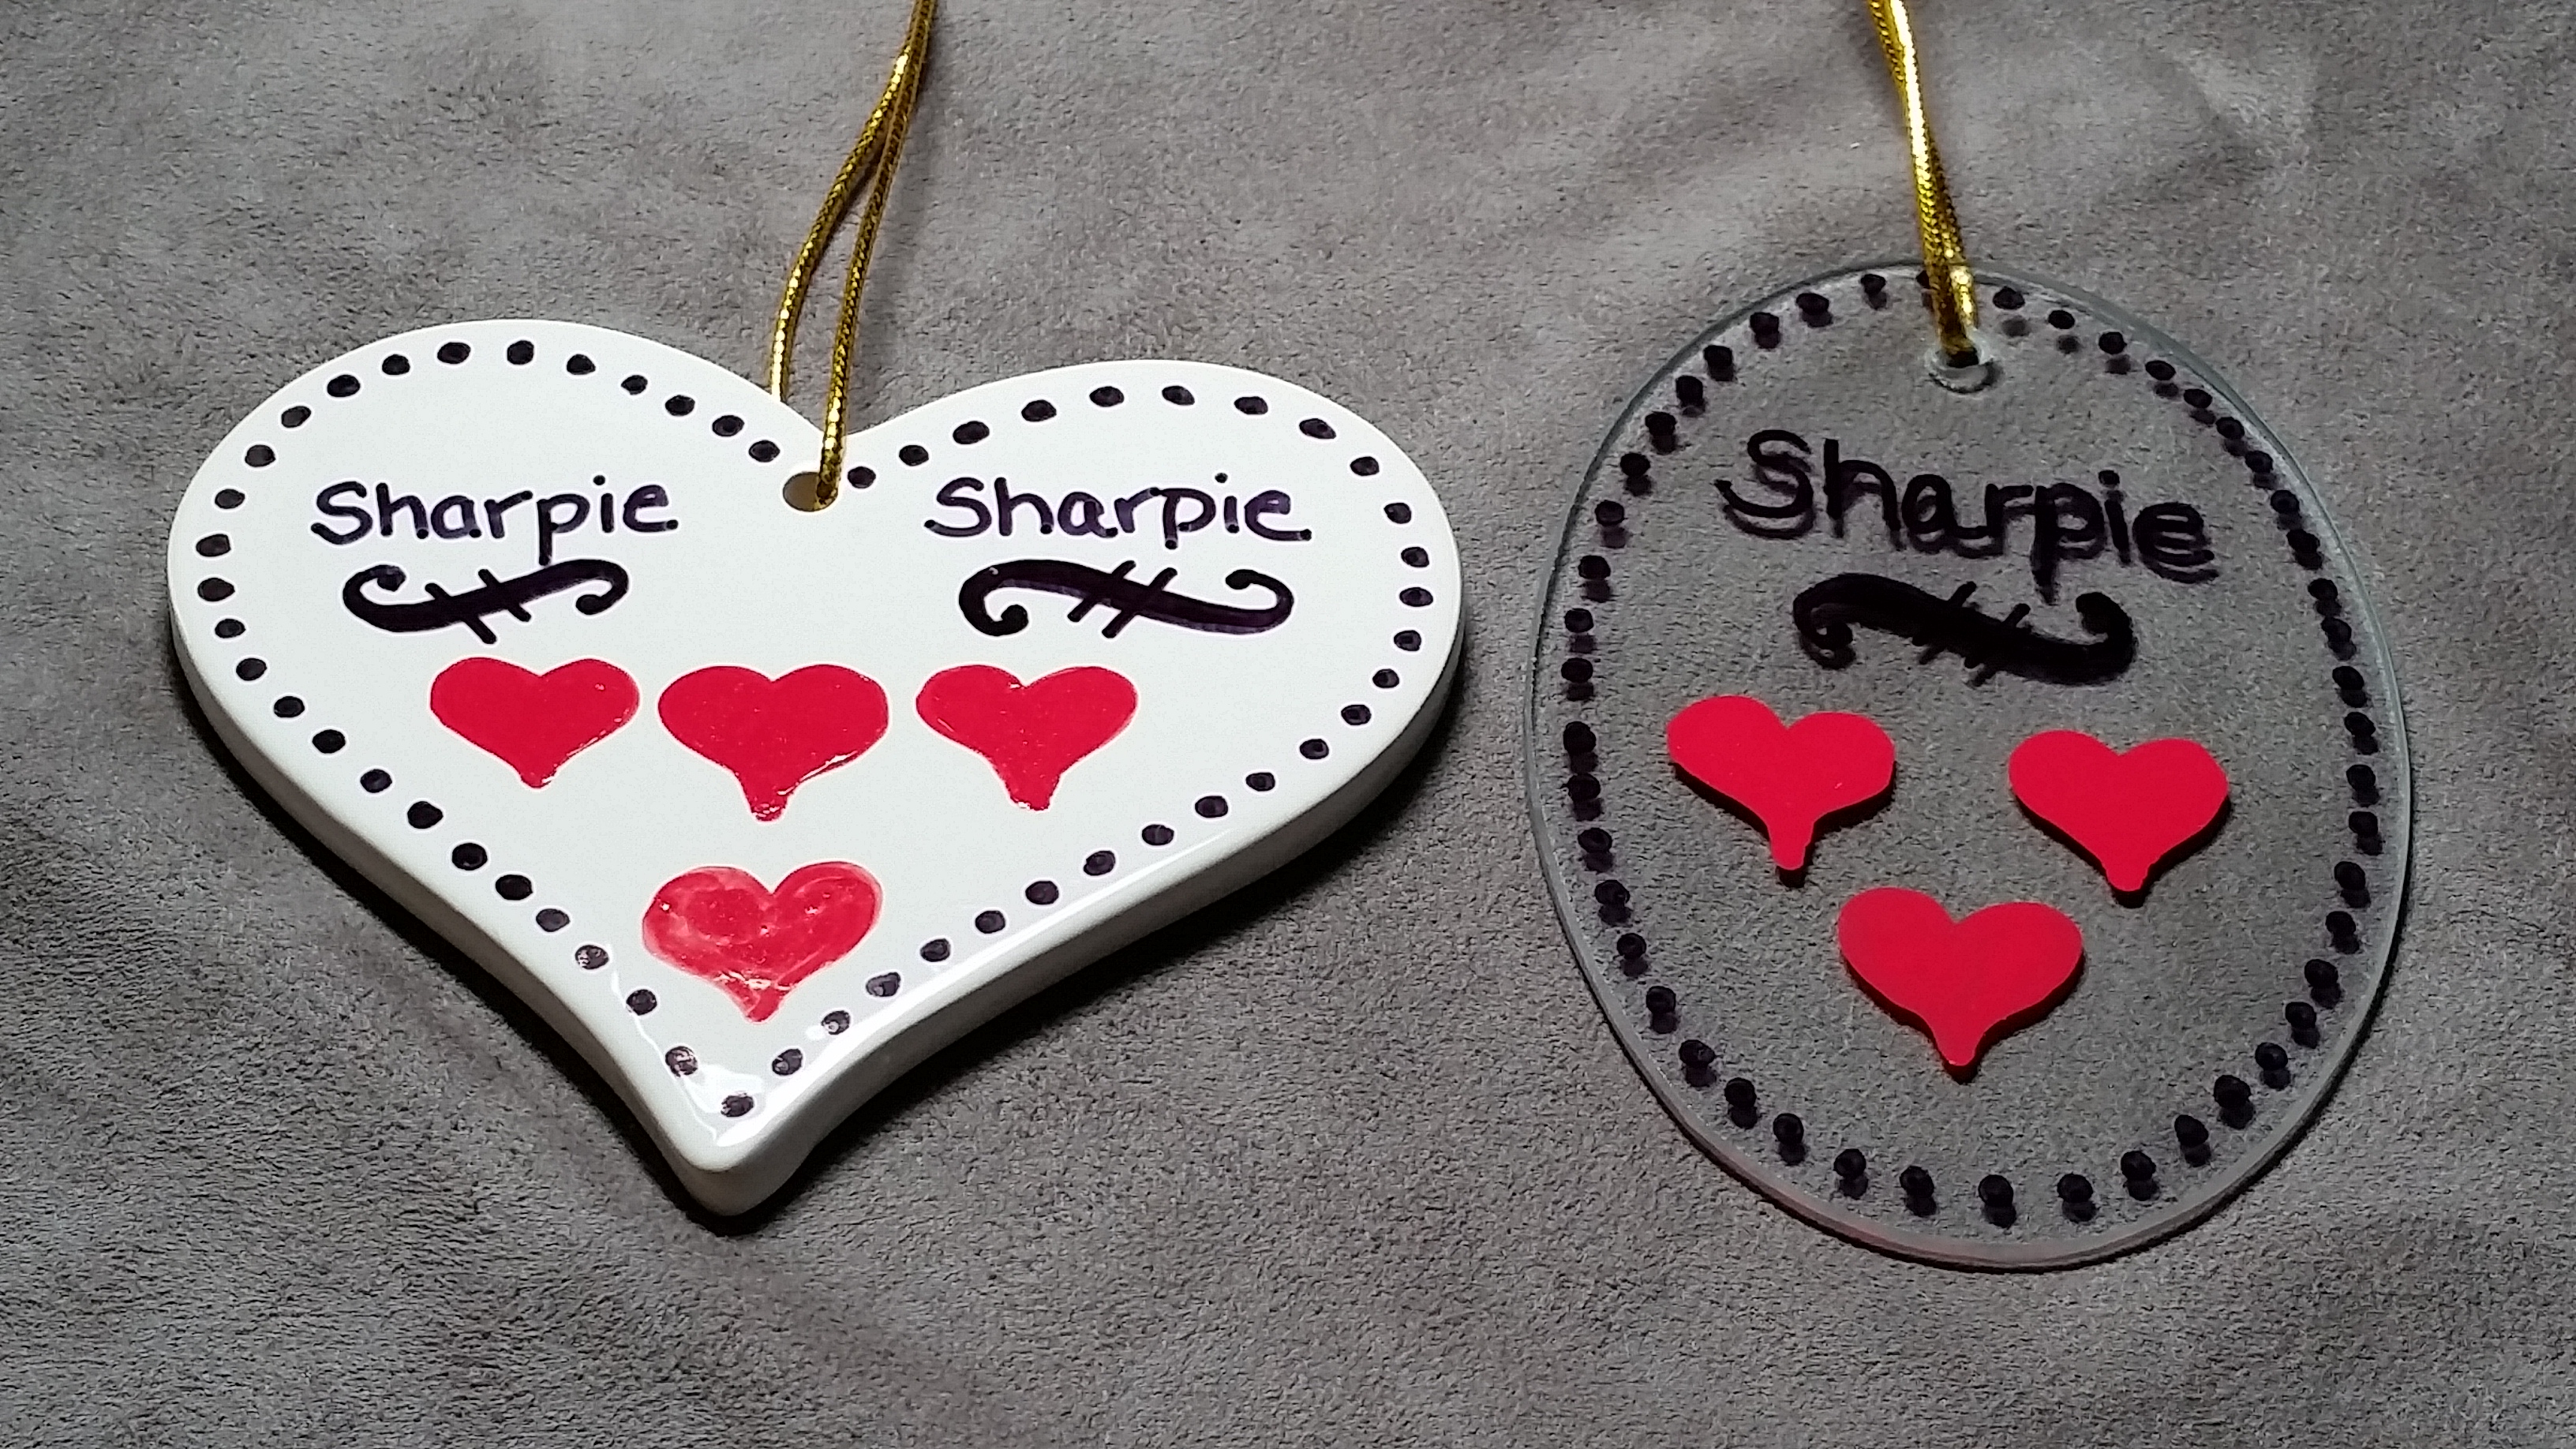
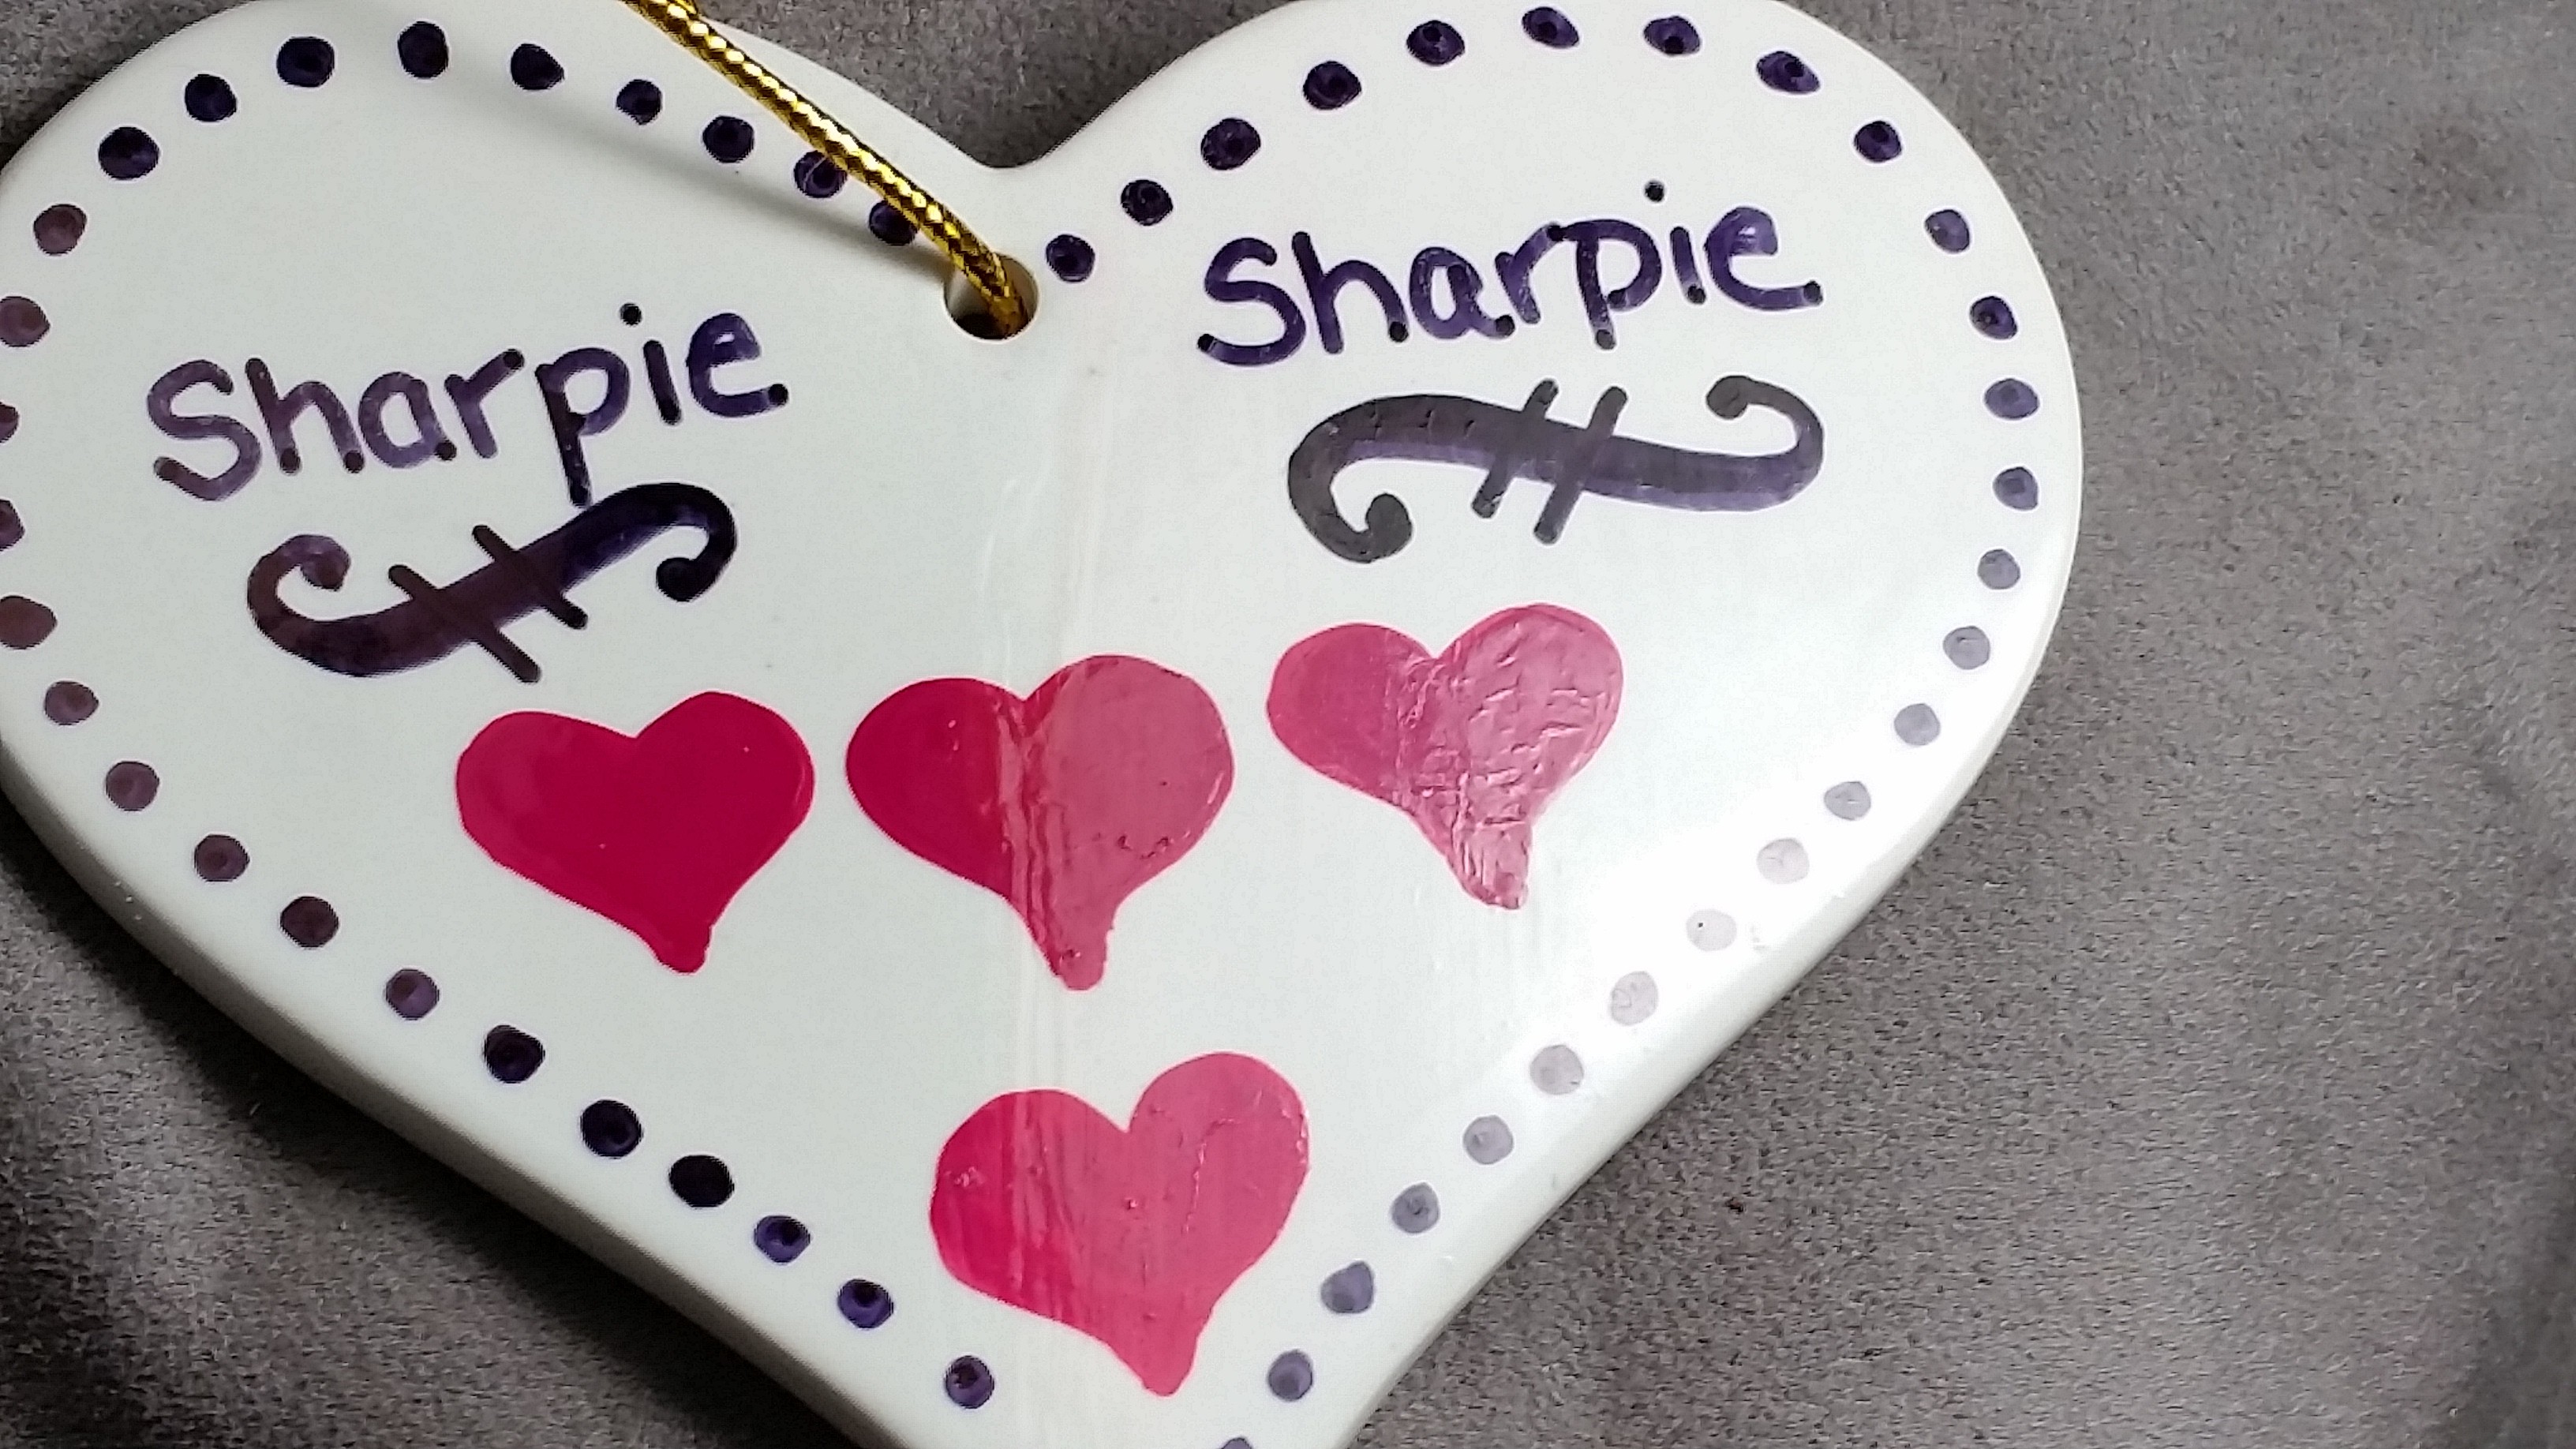
I went to the local craft store to find some ceramic and glass items small enough to live in my dishwasher for 10 washings. I decided on some Christmas ornaments, since they’re small and quite inexpensive ($1 each). I decided to use both the original Sharpie in black (and let it dry, then trace over it again) and the oil-based Sharpie in red.
Because this is simply a proof of concept, I came up with a simple design. When I’m done with the design, I’ll seal the right half with the glossy, original Mod Podge (and the design ensure I’ll seal both the original, black Sharpie and the oil-based, red Sharpie).
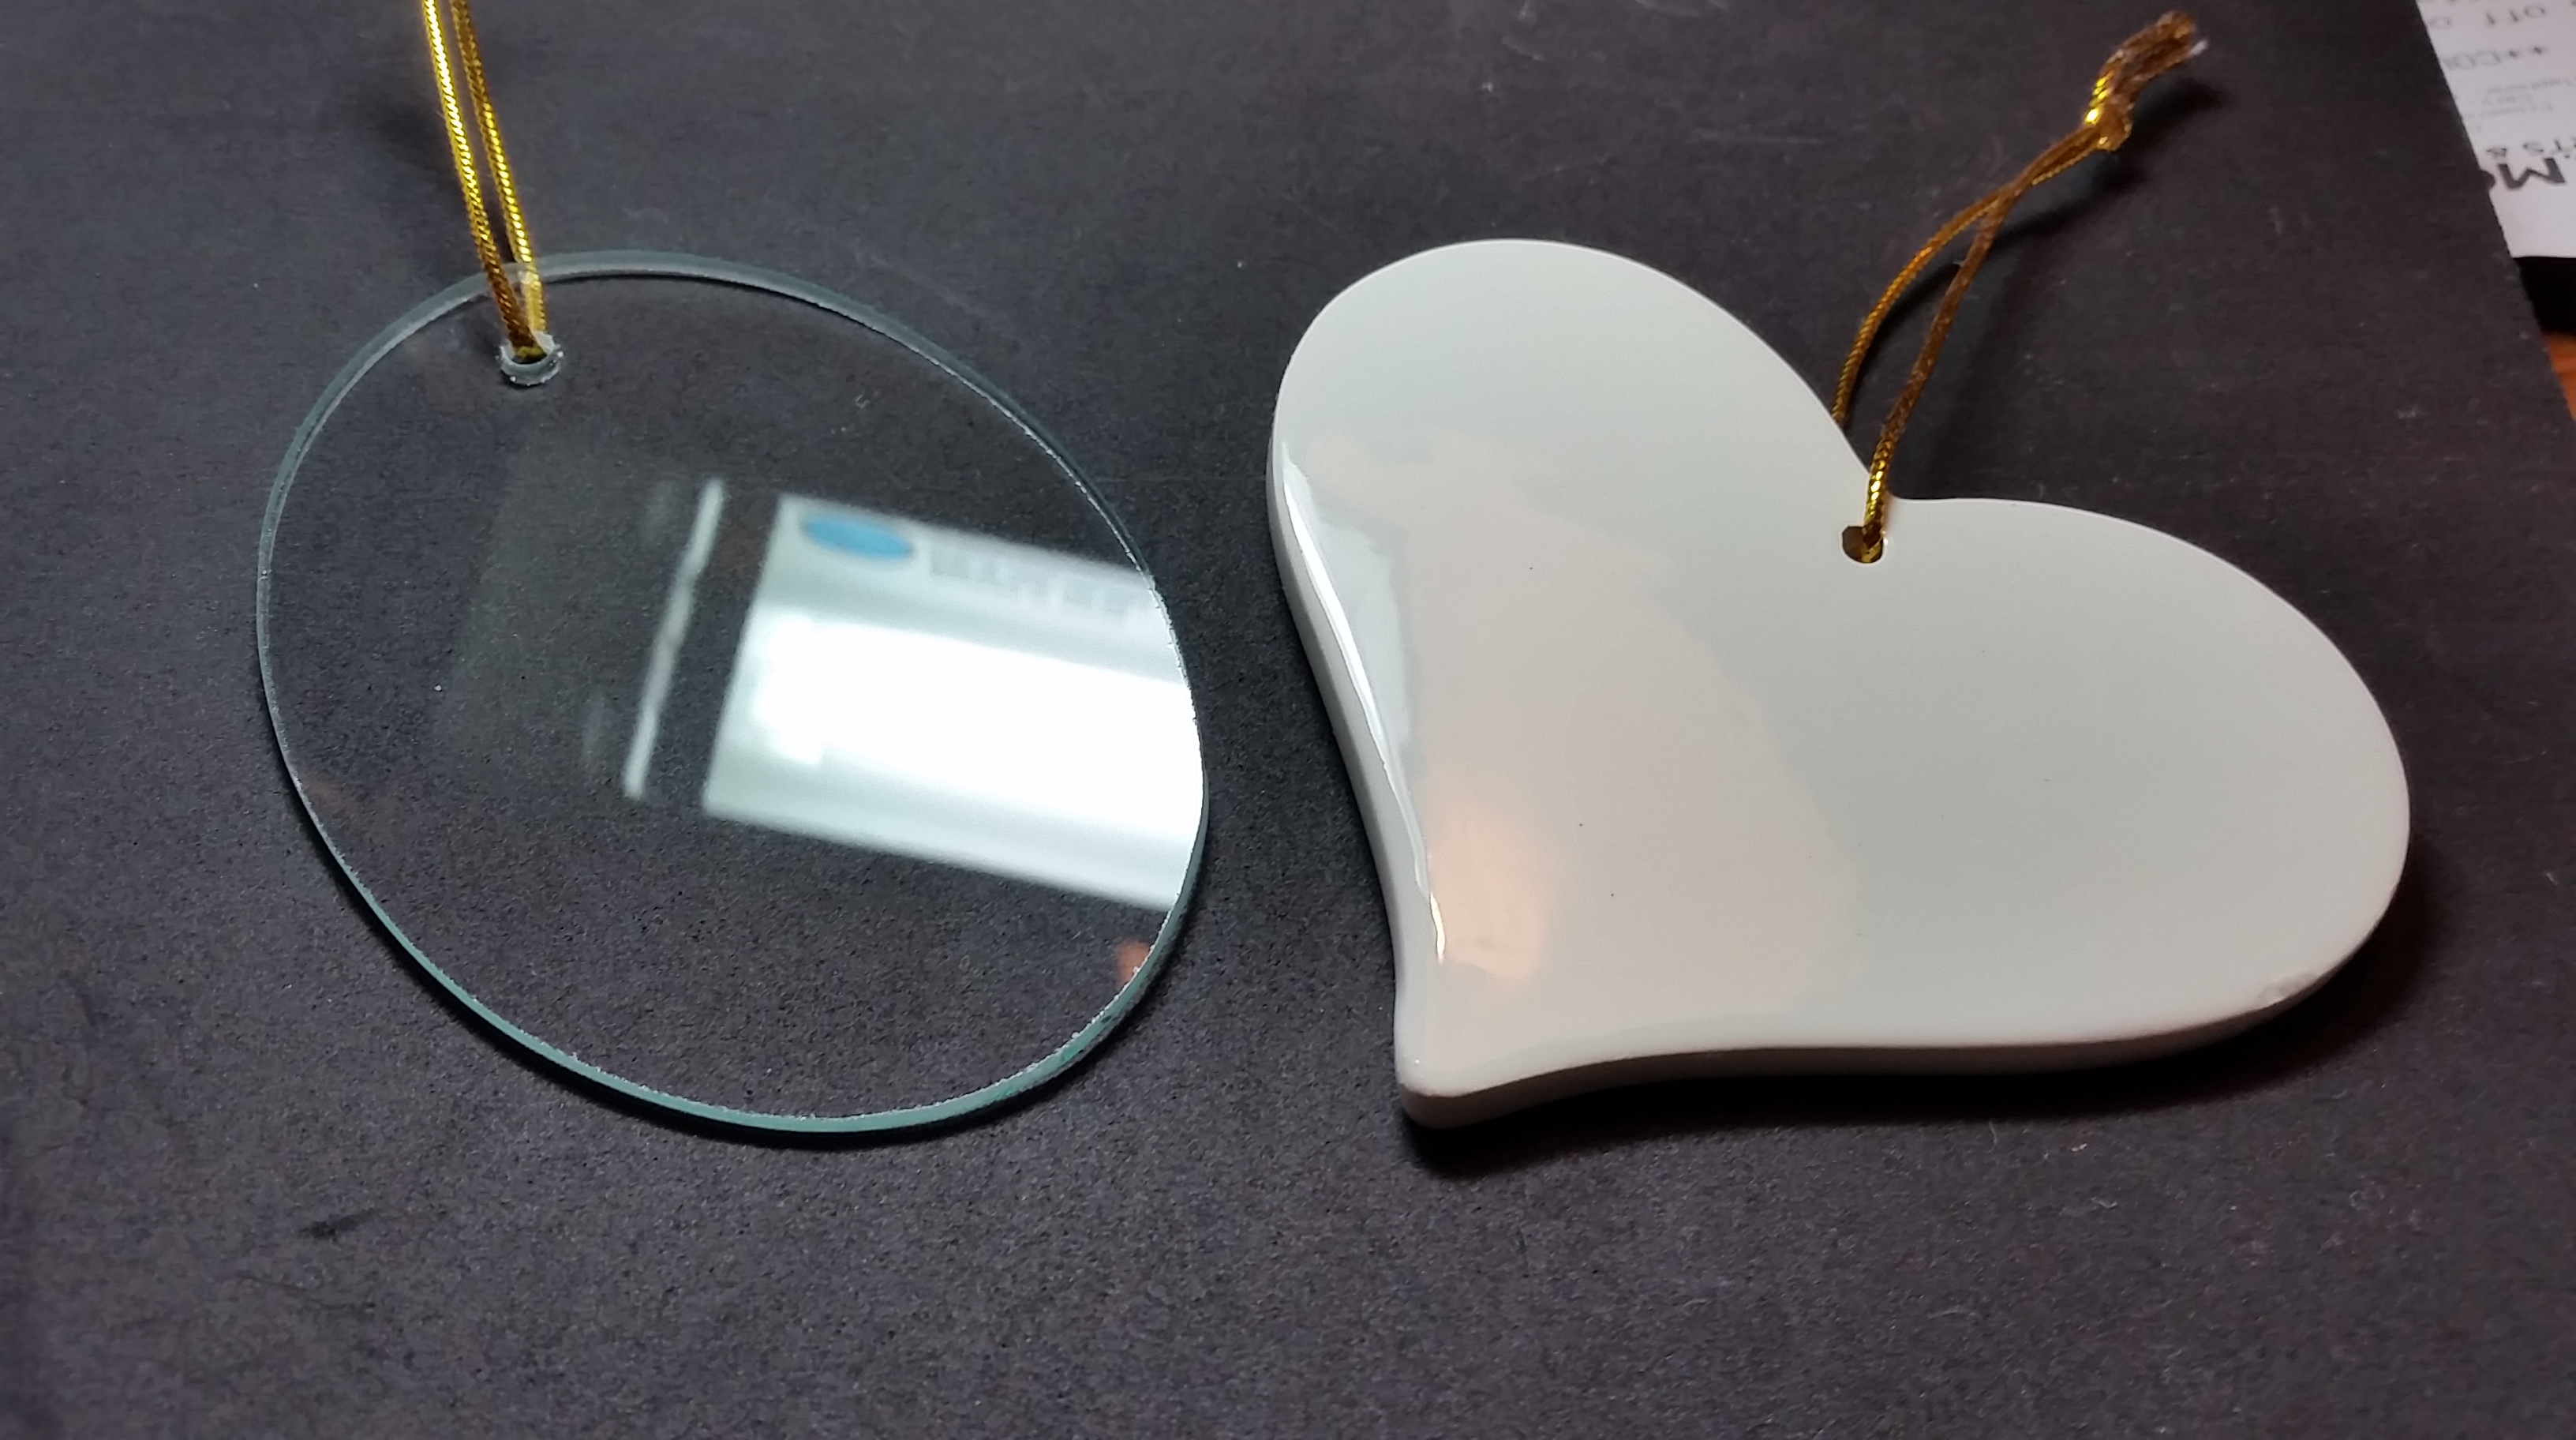
The ornaments were prepared first by washing them with Dawn dishwashing liquid, dried with a towel, then wiped with rubbing alcohol on a paper towel. I applied the black Sharpie going over it twice to ensure a good, dark coat. I then drew the hearts.
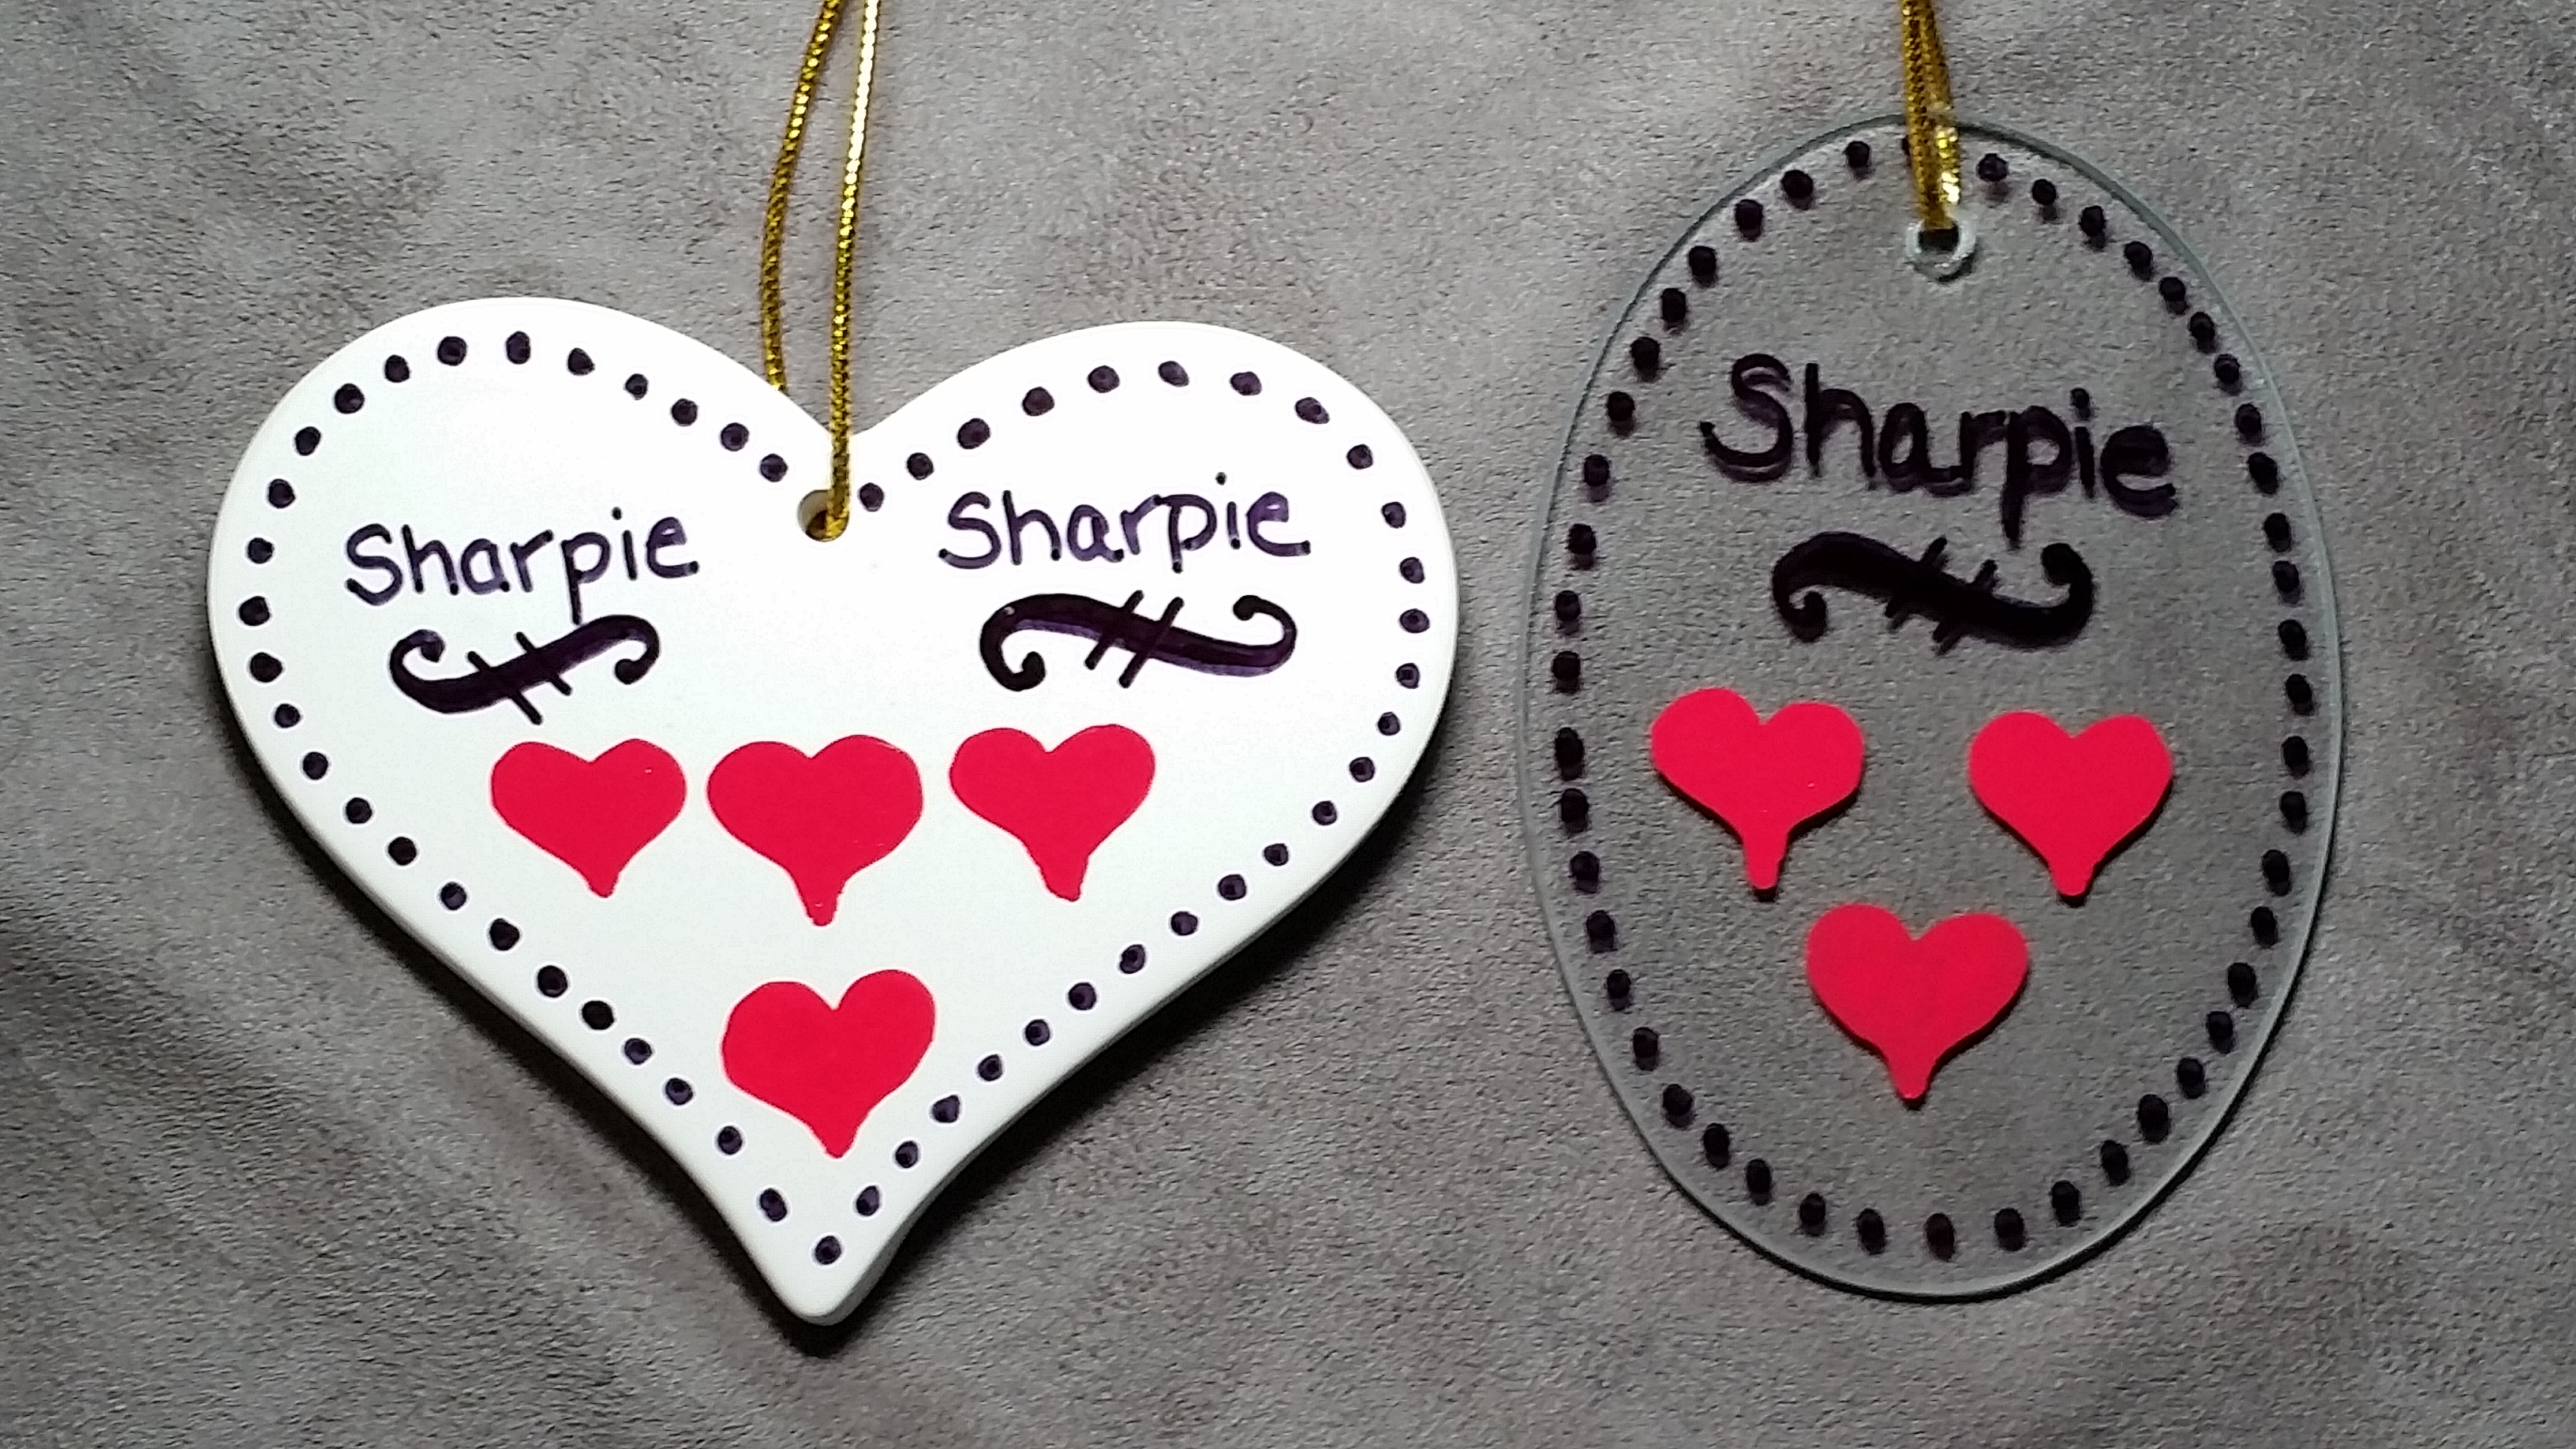
I then put them into a pre-heated oven (on a cold cookie sheet) and baked them at 350F for 30 minutes. For completeness, I’ll include a photo of them after they’ve cooled.
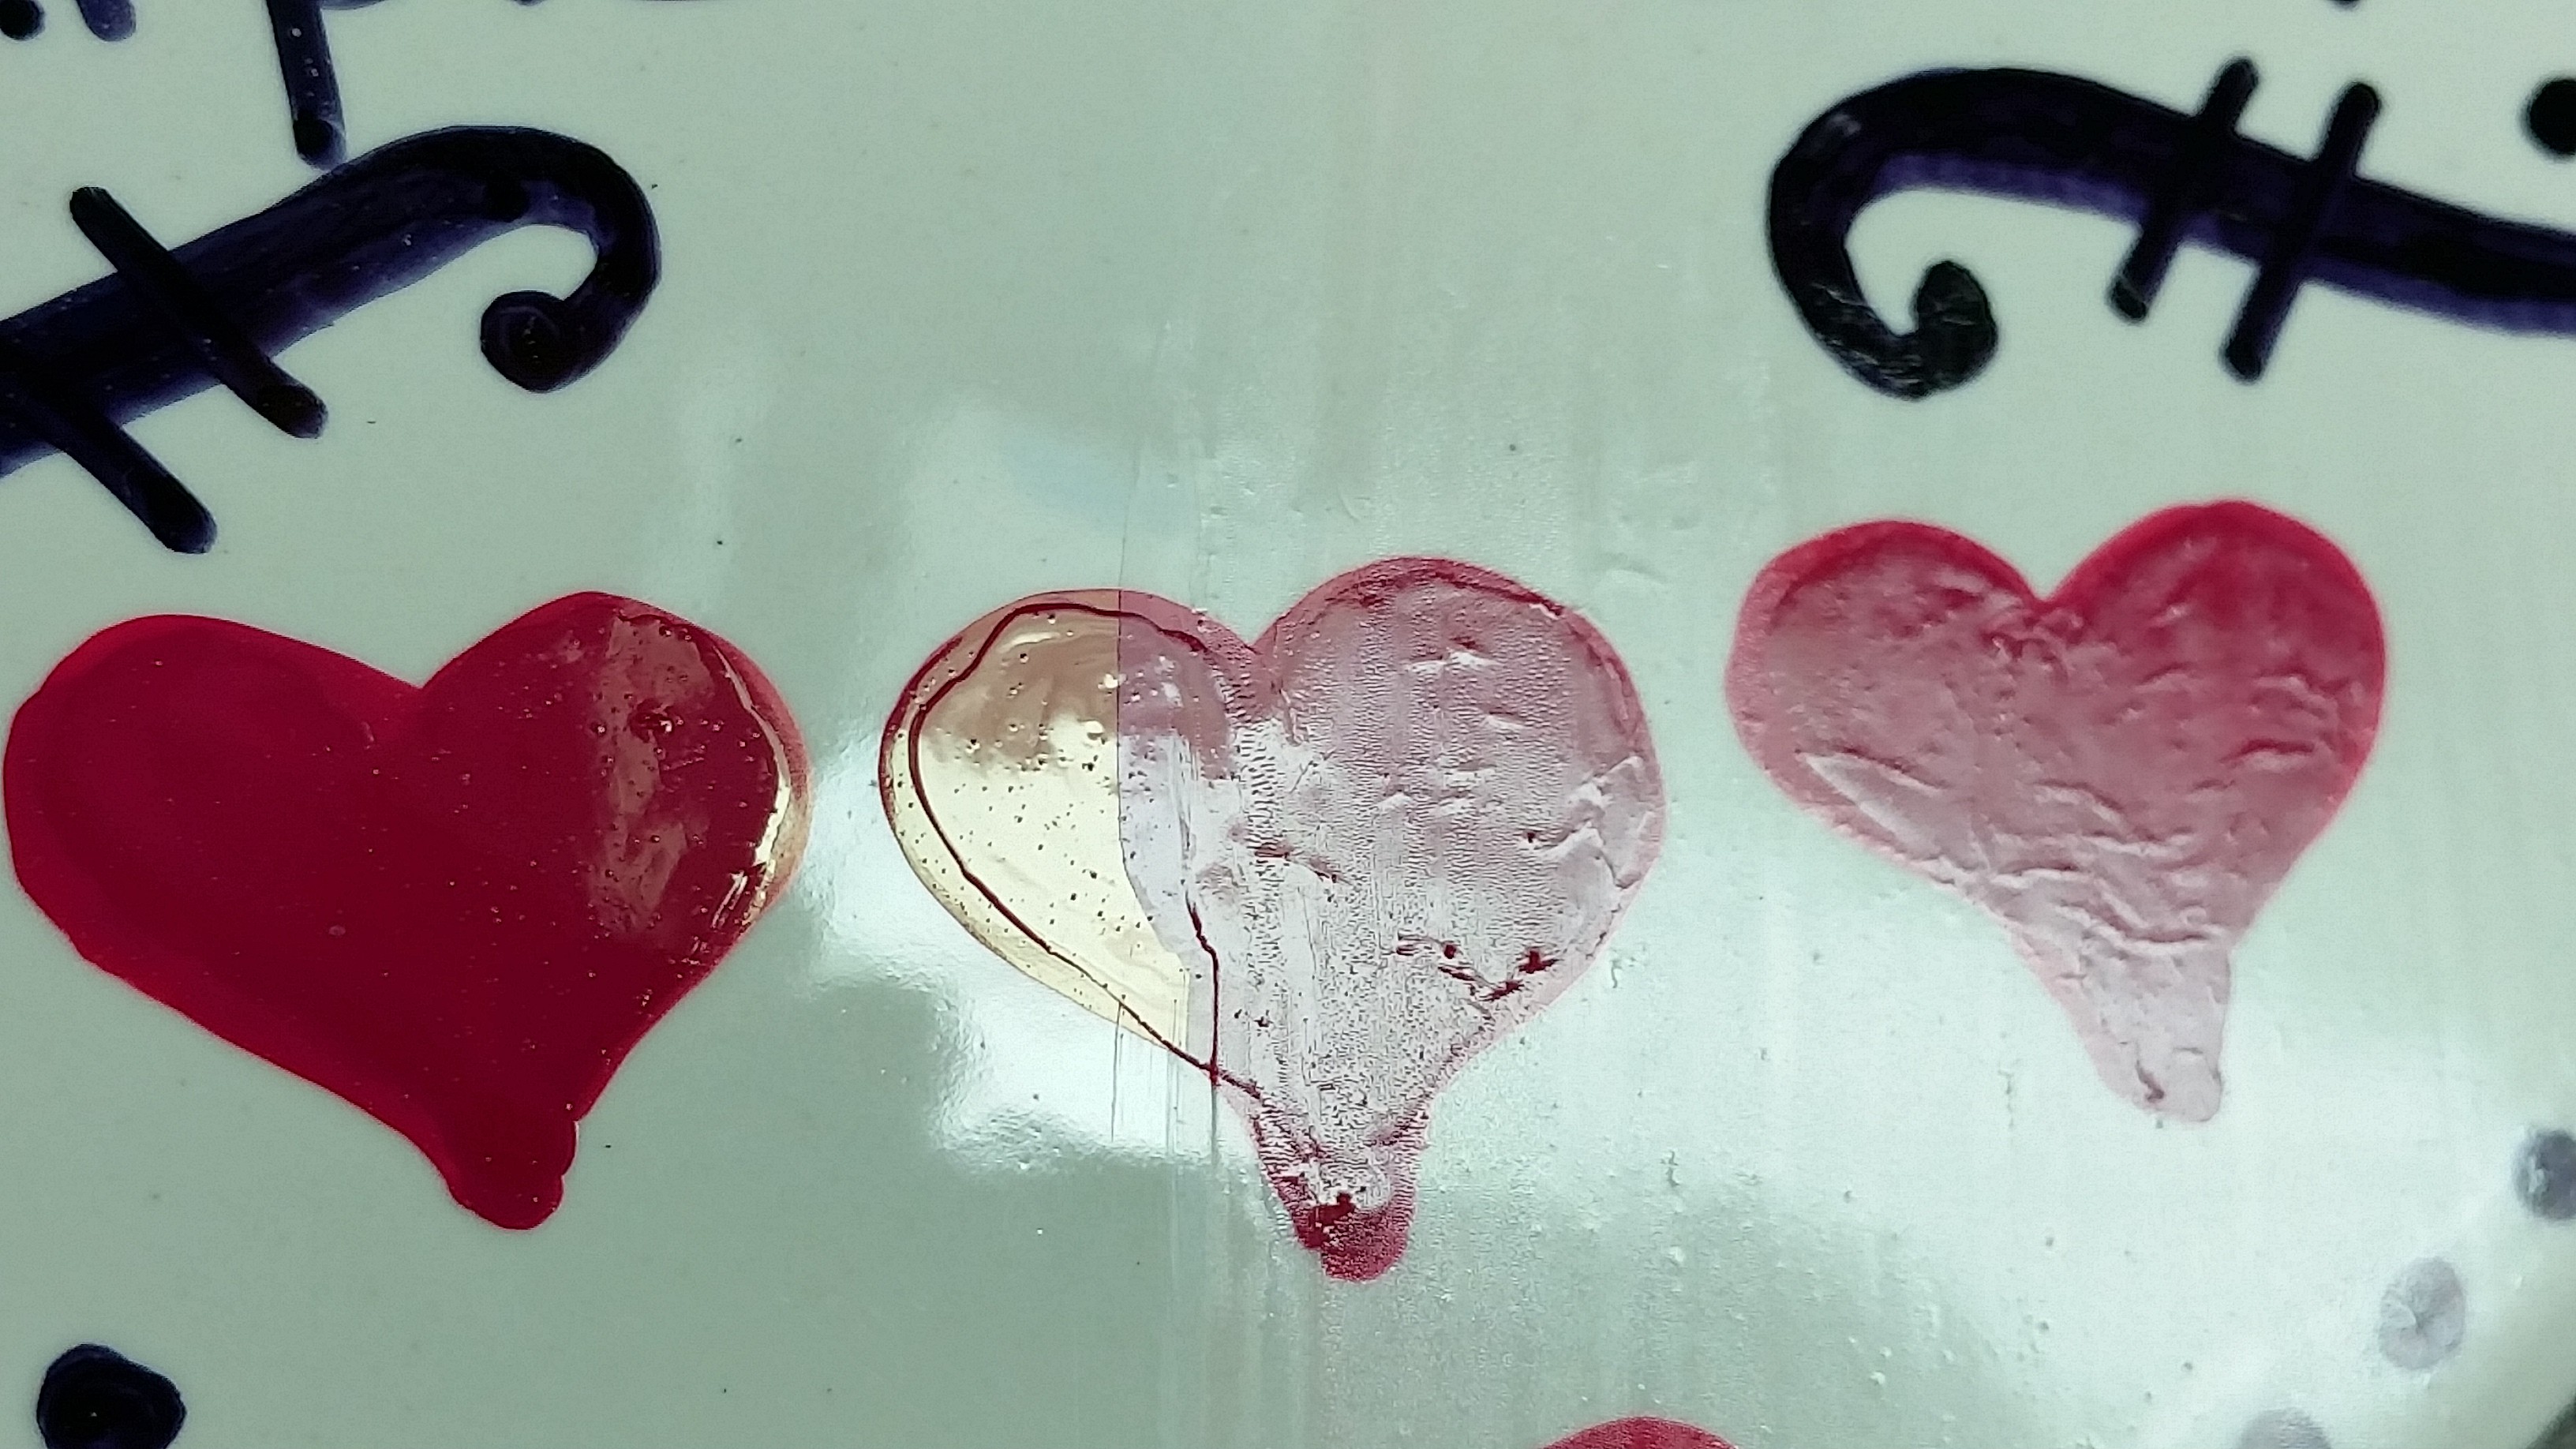
Following the directions on the Mod Podge container, I put two thin coats of Mod Podge on the right side of the ornament, waiting 40 minutes between coats (mostly because I got distracted and didn’t get to it right at 20 minutes like the label says). After a while, I looked at the dry ornaments. It was pretty obvious which side was the sealed side.
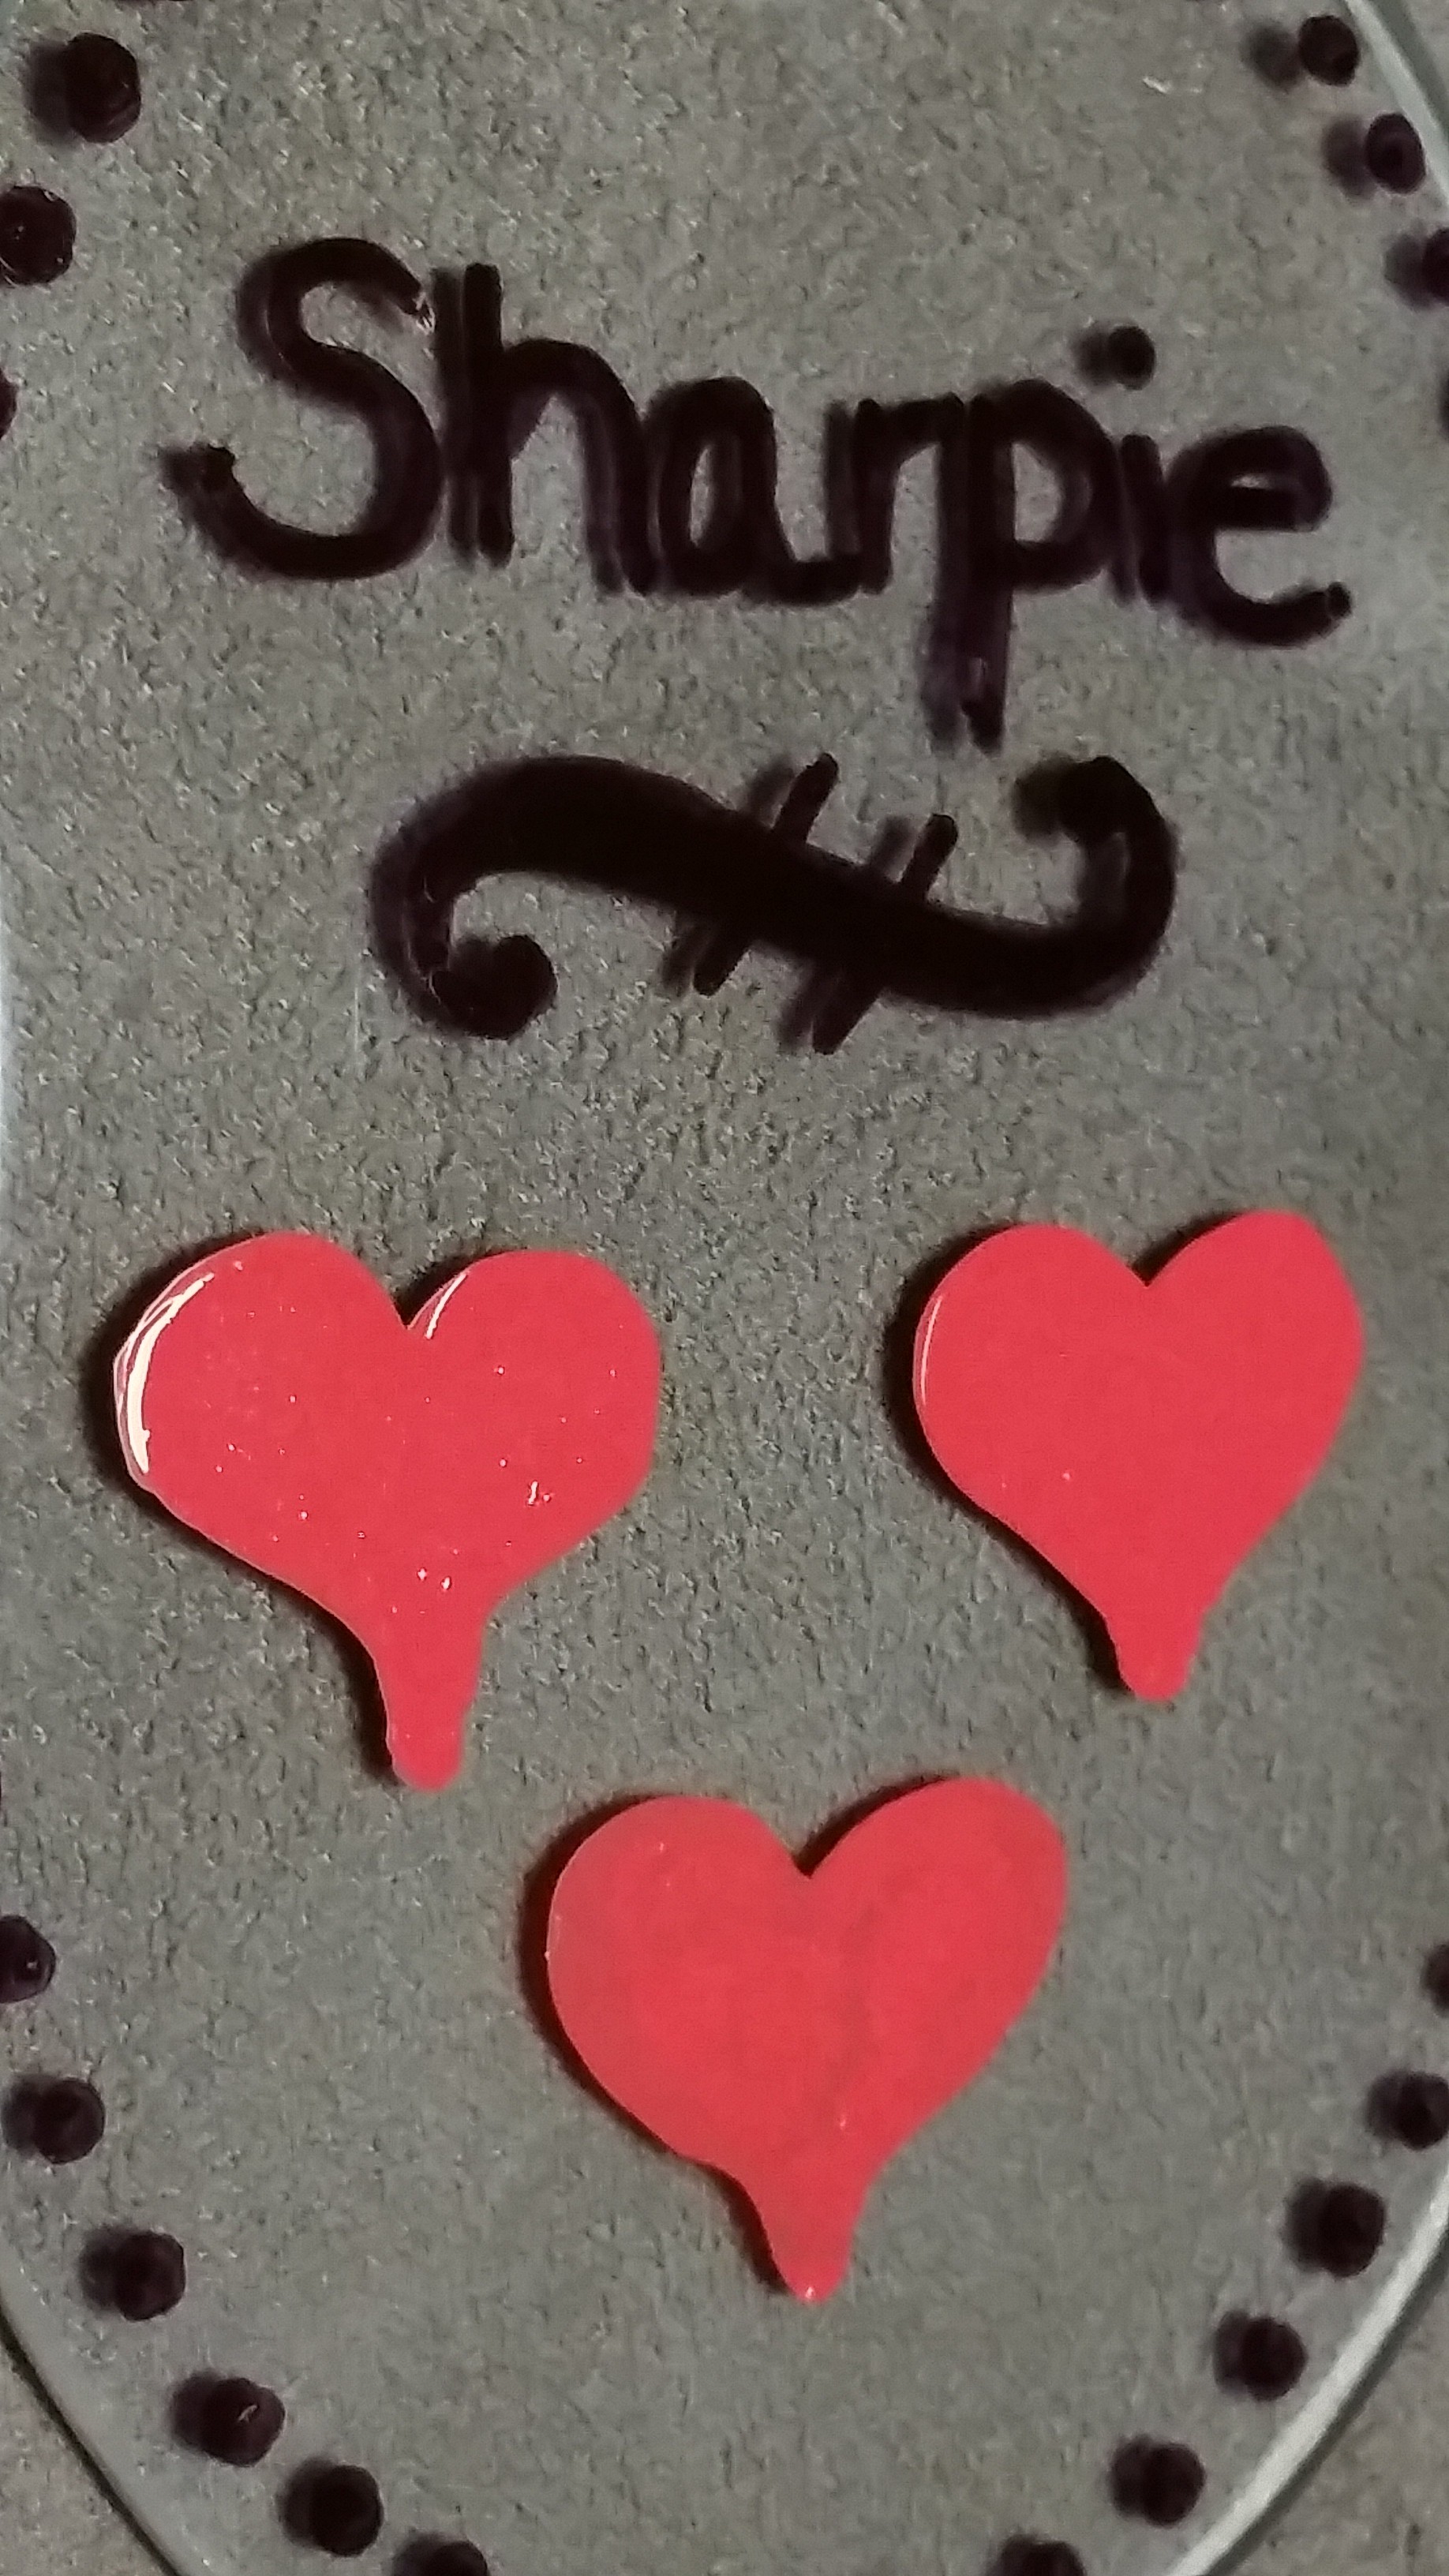
I like the look of the Sharpie (either oil or alcohol pens) on the ceramic and glass ornaments. I’m a bit underwhelmed at the look of the Mod Podged side. The sealant gives a hazy, duller appearance, and the brushstrokes don’t level out. One interesting effect is that the oil-based paint crackles underneath the Mod Podge. I believe this is some sort of incompatibility between fresh oil-based paint (of any brand, and by “fresh,” in the oil-based world, I mean that it was applied less than several months ago) and a fresh application of water-based sealant (of any brand) on top of it.
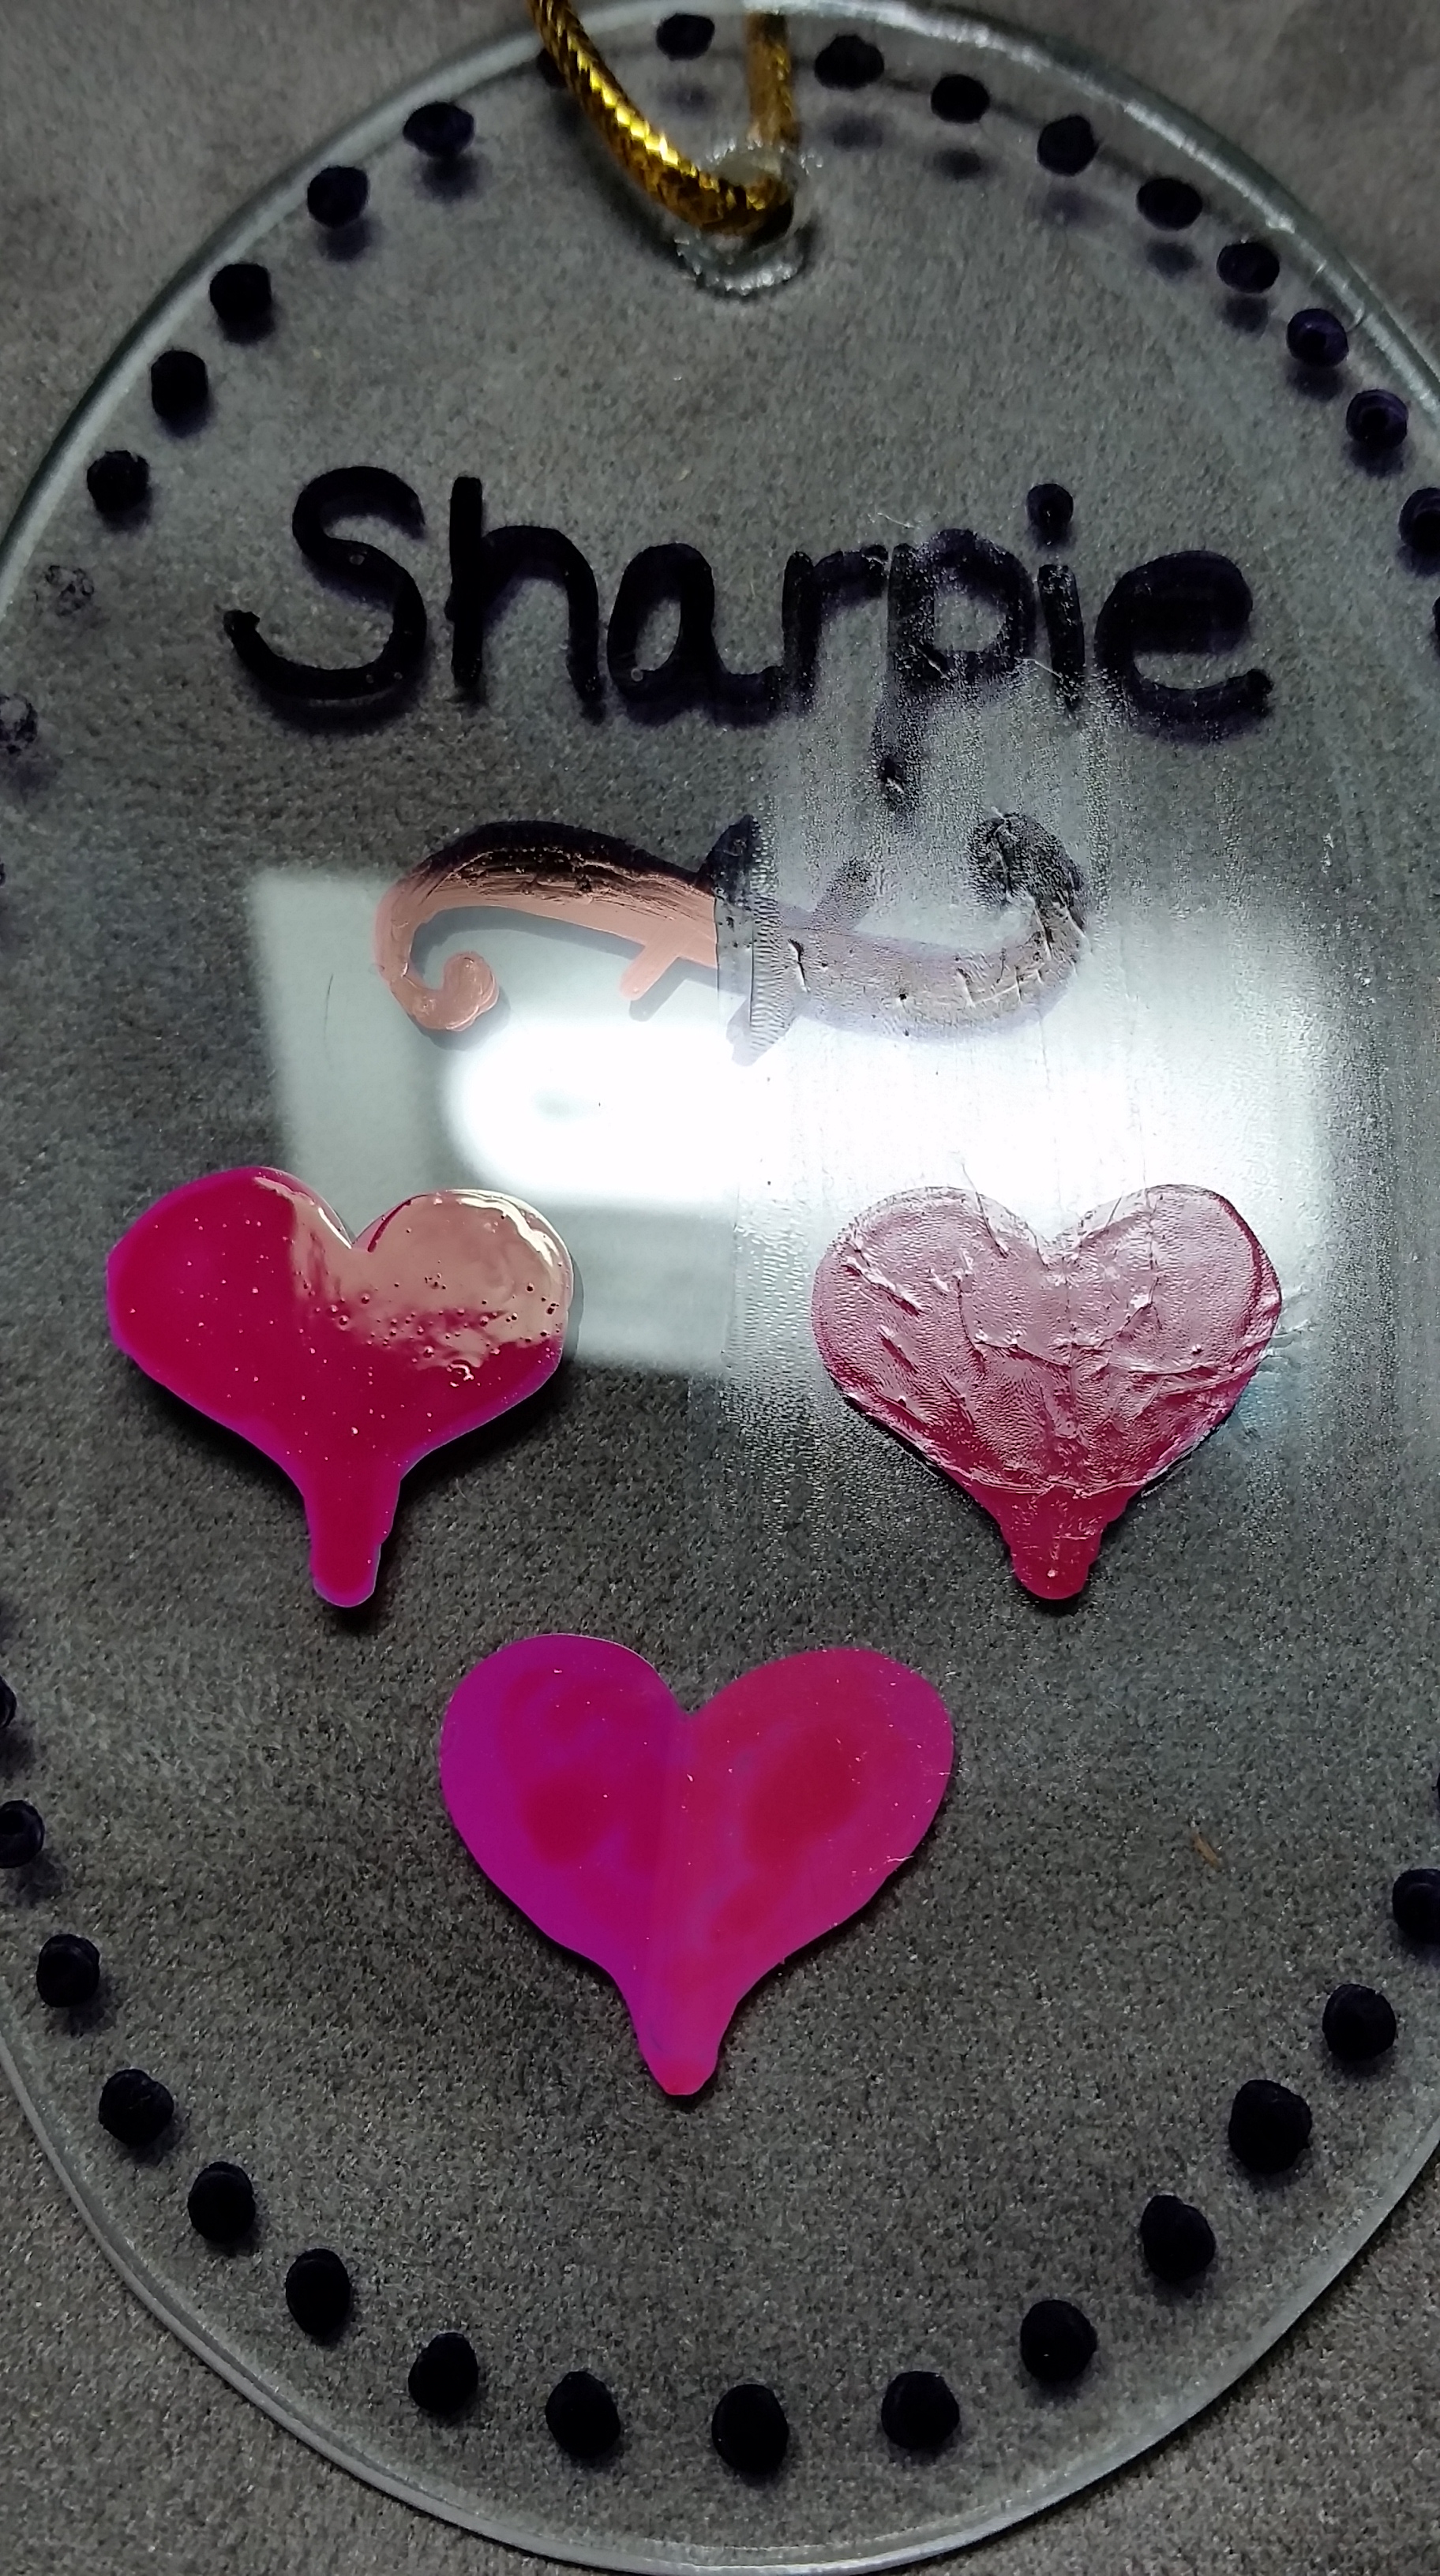
The glass ornament is similar. It’s also dull and hazy on the right side. And the crazing happened, too. I should also point out that I was trying to remove a thumbprint, I gently rubbed them with a tissue and inadvertently rubbed off a few of the dots on the left (unsealed) side of the ornament!
It’s a whole lot more difficult to photograph the sheen (or lack thereof) on glass and ceramics than I thought! I’ll say that the sealed side on both ornaments looks about like I thought it would. It’s dull, hazy, and not nearly as attractive as the unsealed side. The sealant would be quite acceptable on a wooden ornament, but just doesn’t look right on ceramics or glass. At this point, I’m too picky about the appearance and would consider this not suitable for sealing Sharpies on glass or ceramics (there are other projects for which Mod Podge, Sharpies, and/or glass and ceramics could work, but this just isn’t it).
In the event that readers are OK with the look of this piece, I did go on to check to see how well it held up for washing. I let them sit for 24 hours to ensure proper curing, even though the label does not say how long to let it set. Then I set out to do the first test of washing the item.
The way I did it before was to use dishwashing liquid and a very worn scrubbie sponge and lightly wash the item for 25 strokes. Lightly, like rinsing dinner dishes, not trying to scrub off dried-on food. This replicates several months of handwashing and minor dings from normal wear and tear.
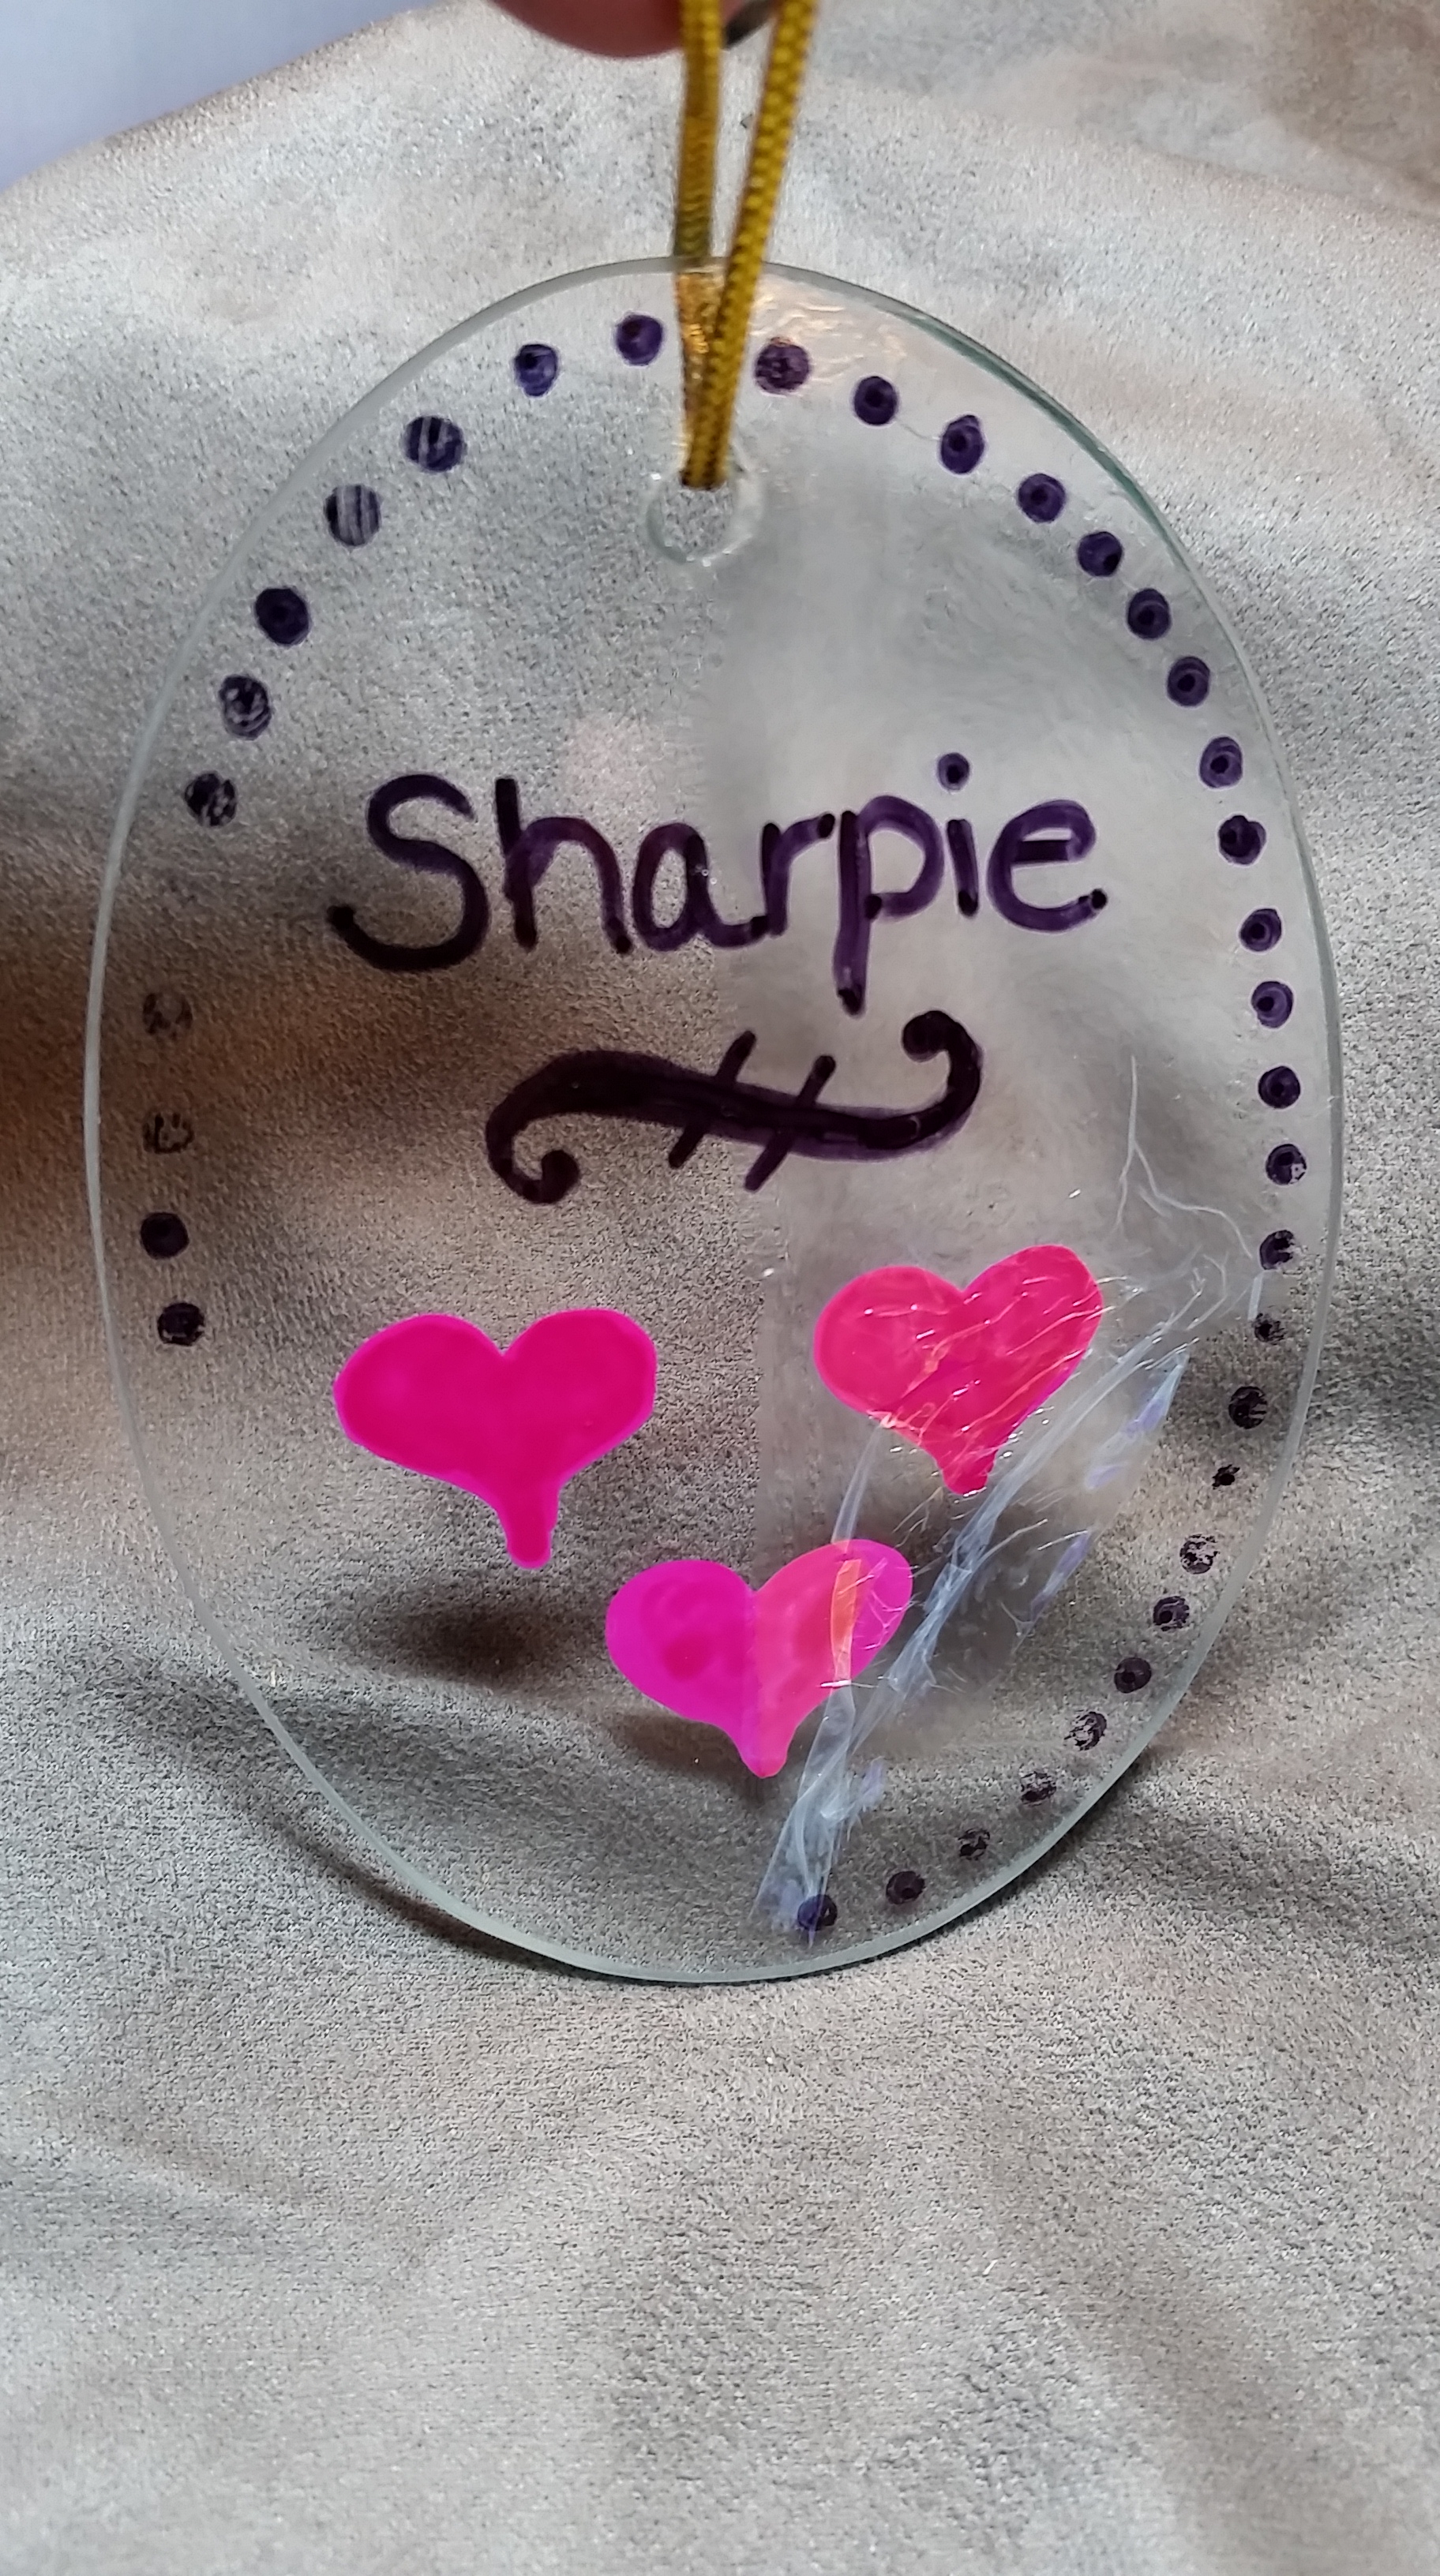
Here’s the result of the
It didn’t even take the full 25 strokes for the Mod Podge layer to lift up and wad up on itself.
If you want it to look like ceramic or glass, I don’t think there’s a sealant out there that will give you that glass-like surface.
Now, let me make some suggestions before I see them in the comments:
- Why didn’t I use the dishwasher-safe Mod Podge formula? Mostly because I didn’t see it at any of the four craft stores I checked. I did find it online. You’re welcome to try it, but while it may adhere better, I doubt it will look any better.
- Why didn’t I let it cure longer? Well, absent any directions to the contrary, many people are going to give gifts or want to use their creation within hours of making it. Now, if you’re into long cures, I’ll direct you to the dishwasher-safe formula, as it requires a 28 day cure.
- Why not try rinsing it with a soft cloth or give it some extra-special care? Because if you’re decorating a mug or wine glass, I can just about guarantee that at some point a well-meaning roommate, significant other, co-worker, or other helpful person will reach for the brand-new scrubbie or toss it in the dishwasher. I’m trying to simulate lots of washing and wear in an easy fashion.
So, what do I recommend? It depends on what you want:
- A quick, gag gift: regular Sharpies.
- An item that doesn’t need to last past the weekend (say, putting names on coffee cups for a weekend get-together): Oil-based Sharpies.
- Something decorative that won’t be washed: anything.
- Something you’d like to treasure for several months to a year: the craft paints specifically formulated for glass. Note: each 2 oz bottle is usually cheaper than an oil-based Sharpie and comes in so many more colors!
- Something that will last many years, even through the dishwasher: the Pebeo paints (Porcelaine and Vitrea). At the time of this writing, oil-based Sharpies are $4.49 at the craft store, and the Pebeo markers can be had for $5.05 at an online art supply site. There’s no economic reason not to use the right product.
I’ve done several projects with the Pebeo products. One in particular is that I’ve labeled my decorative cooking oil bottles (olive, peanut, canola). They are knocked around daily. They are wiped off frequently, and depending on the helper, they might be wiped off with varying kinds of household cleansers. These are most definitely NOT pampered! They are about 4 years old and look great. And that is why I’ll highly recommend the Pebeo products. I haven’t done any projects with the craft paint, other than the tests for this blog, so I can’t vouch for their durability other than the quick test. And that test piece is still floating around my house, moved from place to place (but mostly just hanging out somewhere), and it still looks good.
I just can’t recommend sealing ceramics or glass with a sealer, though.

Thank you so much for this thorough, rigorous series about paint for ceramic/glass. You stand out among other bloggers, let me tell you. I have been lately considering extending my hobbies to crafts, which seems a daunting task with the amount of materials, techniques, etc. available. I want the right tools for the job, and you have helped me immensely – and probably saved me a lot of money – with your analytical approach!
Thank you so much Caroline! I’m glad to have helped. I just hate to see people spend a lot of time and effort on a project when the materials they use can doom the project to a untimely end. I wish you much success on your crafting endeavors!
Very well written with extensive research. I have been reading other writers who promote the “Sharpie & spray on sealant” method. You’ve saved me a lot of time and money. Pebeo it is.
Thank you !
You’re welcome! I’m glad I can help. I’d hate for anyone to spend a lot of time, effort, and care on a piece only to have it not come out as good as they’d like.
Caroline, thank you so much for all your research and reporting. I read through your whole series of articles and I was very impressed at your thoroughness. As I am decorating ceramic Christmas ornaments to sell I really appreciate this information. Thank you, Thank you, Thank you!
Thank you very much for these posts. I was thinking of trying out Sharpies ceramic tile coaster project, and your posts helped me a lot. However I am wondering would it be better to seal the tile with Epoxy resin to make it water proof and dishwasher proof and heat proof? There are quite a number of Sharpie + alcohol on ceramic tile DIY tutorials on the Internet. Do you think the Epoxy resin would react with the sharpie and alcohol and mess up the beautiful marbled effect? It would be nice if you could do a series of post about it😃
Hi Felicia! Thank you so much for your kind words!
It’s been many, many years since I worked with epoxy resin. I would think that it would definitely be waterproof, but I won’t hazard a guess on dishwasher proof and heat proof. It would depend on which product you use. If I used an epoxy resin, I wouldn’t use tile as a base for resin. Why? Ceramics are heat tolerant, waterproof, and have that beautiful, shiny glaze that is difficult to get many paints to stick to. If you’re going to change the finish with the resin, why not use some other material? The resin finish will be waterproof and probably reasonably heat tolerant, but wood, cork, paper/cardboard, and many other surfaces weigh less, are less likely to scratch tables (for coasters), and may be easier to decorate. Why spend effort on one of the hardest surfaces to decorate, then change its entire finish?
I have no idea if the resin would react with the Sharpie…it very well could, so I’d test it, first. That is independent of what surface (ceramic or otherwise) the Sharpie is on.
Funny you should ask about a series of posts on it. I’m looking into quite a number of ways to decorate glass and other materials. I think I have enough content for a good blog. Look for more projects towards the summer. Epoxy resin sounds is a medium that’s on my list to try!
wow!! outstanding piece. Thank you so much for sharing…I’ve just taken quite a few products out of my amason basket!! What a star you are 🙂
Wendy, thank you so much! I’m glad I could help you before you spent money on products that aren’t suitable for your project. That’s my goal — I’d hate to have someone spend lots of time, effort, money, and love on a project that won’t live up to expectations. Thanks again for the compliments; you’ve made my day! 🙂
Thank you so much for all the information in these articles!
I am looking to use the dishwasher safe mod podge on a ceramic mug with sharpie writing, and I have two questions: will the mod podge dull the gloss on the mugs and 2, will it smudge the sharpie? Any help you can give would be great!
Hi Susan,
Unfortunately, yes, the Mod Podge (and nearly any sealant) will dull/change the gloss on the mugs. Unless you have good air brush to spray on the Mod Podge, you’ll also see brush strokes in addition to the change in sheen. Will it smudge the Sharpie? If you’re using the regular Sharpies (alcohol-based), it might. If you’re using the oil-based paint Sharpies, it won’t smudge, but it may cause it to pucker and bubble. I don’t recommend using Mod Podge as a sealant on ceramic or glass projects.
Thank you again, for explaing all of this so well. Because I am fairly new to this craft, I was planning on running out and getting Modge Podge this next week but now I know better. It would be nice to know of some sort of protective spray or brush on clear substance to protect any marker or paint we decide to use! (Even after baking) just to seal the deal, ya know?!
Sealants are good for porous surfaces (wood, paper, terra cotta) to prevent any other stains from being absorbed (why you finish a wood table), prevent the design from moving around (think a fixative on a charcoal drawing on paper), or to put an even finish on the whole product (decoupage). The non-porous surfaces, like glass and glazed ceramics, need specially designed paints to adhere to a surface that is difficult to get anything to stick to (which is why they make such wonderful drinking/cooking/serving vessels!). Most standard crafting materials are porous, so it’s understandable to think that everything needs to be finished with a sealant. If you need to seal the design so it doesn’t fall off of glass/ceramics, you are using the wrong product!
I’ve had several projects that I’ve used the Pebeo products on, and they’ve stood the test of time and have been knocked about my kitchen for years, over a decade now. They still look good as new. I high recommend them, and they aren’t significantly more than oil-based Sharpies. However, there are many others out there. If you use a product formulated for use on glass/ceramics that the manufacturer promises to be dishwasher safe, it should be good. Use the right product for the right job!
This was amazing….and i just cant tell you how amazing…i was about to buy the stuff sitting in my car and decided to just google which type of sharpie is better with the selant….you have saved me so much time, disappointment, and money. Thank you
Glad to help! Thanks for your compliments, you made my day!
Thank you! My students are going to be decorating ceramic tiles to put around a firepit for an auction item. I am planning to use the porcelain paint per the suggestions of this blog series!
I hope everything goes well for your students! I’d love to see pictures and hear how it turns out!
Thanks for this wonderful series on different paints on ceramic! I am actually researching what paint to use to make screen-printed pint glasses. Do you think the Pebeo Porcelaine paints have the correct viscosity to be screen printed? I can’t find any information about this on the interwebs…
I think you could successfully screen print with Porcelaine. It’s on the thin side for screen printing, but with a little perseverance, I think you could get it to work. I’ve used other Pebeo products with a similar consistency to screen print on fabric with excellent results (though fabric printing is definitely different than printing on glass — more absorbent and no curves).
It’s a pretty inexpensive product to to a proof of concept. If it doesn’t work, I might suggest using the Outliner product. It’s much thicker — however, it only comes in 20ml tubes, so if you’re doing more than a couple of dozen objects, it could really get pricey.
I’d love to know how it goes!