How to Find It
- Clicking on the ≡ Menu (or “hamburger”) button, then select Canvas.
- Selecting a project from the Project Screen and selecting Customize It.
Description
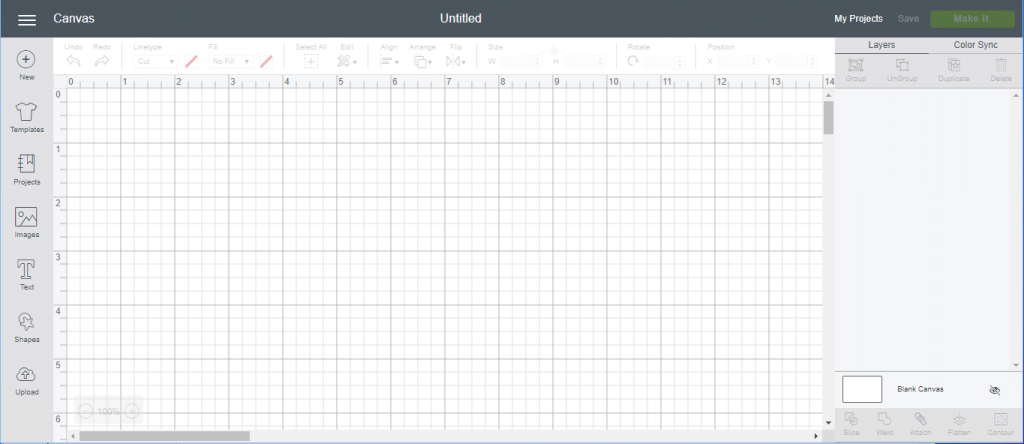
The Canvas screen is the blank canvas on which you’ll create your work of art. Even if you don’t customize your projects, you’ll notice the Canvas screen name on the menu bar as you make your projects. Shown above is a new project with a blank canvas. If you select a project, then come to this screen, you’ll see all the elements that are in the project.
The Design Panel is the menu on the left side. These tools are available:
- Templates – adds a to-scale outline of an item (cards, t-shirt, apron, clipboard, etc.) to help you design your project to size. (Page 54)
- Projects – takes you to the Projects page to select a project to make. (Page 14)
- Images – takes you to the Images page to select images to put into this project. (Page 36)
- Text – adds text to your project in the size and font you specify. (Page 44)
- Shapes – adds basic shapes to your project. The list of shapes: square, circle, triangle, diamond, pentagon, hexagon, star, octagon, heart, and score line. (Page 52)
- Upload – takes you to the Upload screen to upload your own designs or designs you’ve purchased or found for free online (JPG, GIF, PNG, BMP, SVG, or DXF). (Page 62)
On the right is the Layers Panel that describe the shape, image, and textual elements of your design. Layers can have elements grouped together (and they can be ungrouped). Each item in the layer has a designated color corresponding to the paper to cut it from. There’s also an indicator whether the element will be cut, drawn with a pen, scored with the scoring tool, or printed (using Print Then Cut). More information on this later. (Page 26)